Here at mens-fashion.net, we understand the modern man’s desire for both style and substance. Old fashioned pear preserves are a delicious way to connect with tradition and create something truly special, just like a perfectly tailored suit that boosts your confidence. This guide will walk you through every step, from sourcing the best pears to mastering the art of preserving, ensuring you create a sweet treat that’s both impressive and unforgettable. Learn how to make this classic recipe and elevate your culinary skills while embracing timeless flavors.
1. What Makes Old Fashioned Pear Preserves So Special?
Old fashioned pear preserves stand out because they rely on simple, natural ingredients and time-honored techniques to create a deeply flavorful and satisfying treat. They are crafted without the use of artificial pectin or gelling agents, letting the natural sugars and flavors of the pears concentrate into a rich, honey-like syrup. This creates a preserve that not only tastes incredible but also offers a unique textural experience, with glistening slices of fruit suspended in a luscious, golden glaze. According to food historians, the process of preserving fruit in sugar dates back centuries, evolving from ancient methods of food storage to a culinary art form celebrated for its ability to capture the essence of seasonal produce.
Why is making your own pear preserves a worthwhile endeavor?
Making your own pear preserves is a worthwhile endeavor for several reasons. Firstly, it allows you to control the quality and origin of the ingredients, ensuring a healthier and more flavorful end product. Secondly, the process of making preserves can be a therapeutic and rewarding experience, connecting you to traditional food preparation methods. Finally, homemade preserves make a thoughtful and unique gift, showcasing your culinary skills and personal touch. As noted in “The Art of Fermentation” by Sandor Katz, preserving food is a way to connect with our heritage and understand the natural processes that sustain us.
2. What are the Key Ingredients for Authentic Pear Preserves?
The key ingredients for authentic old fashioned pear preserves include:
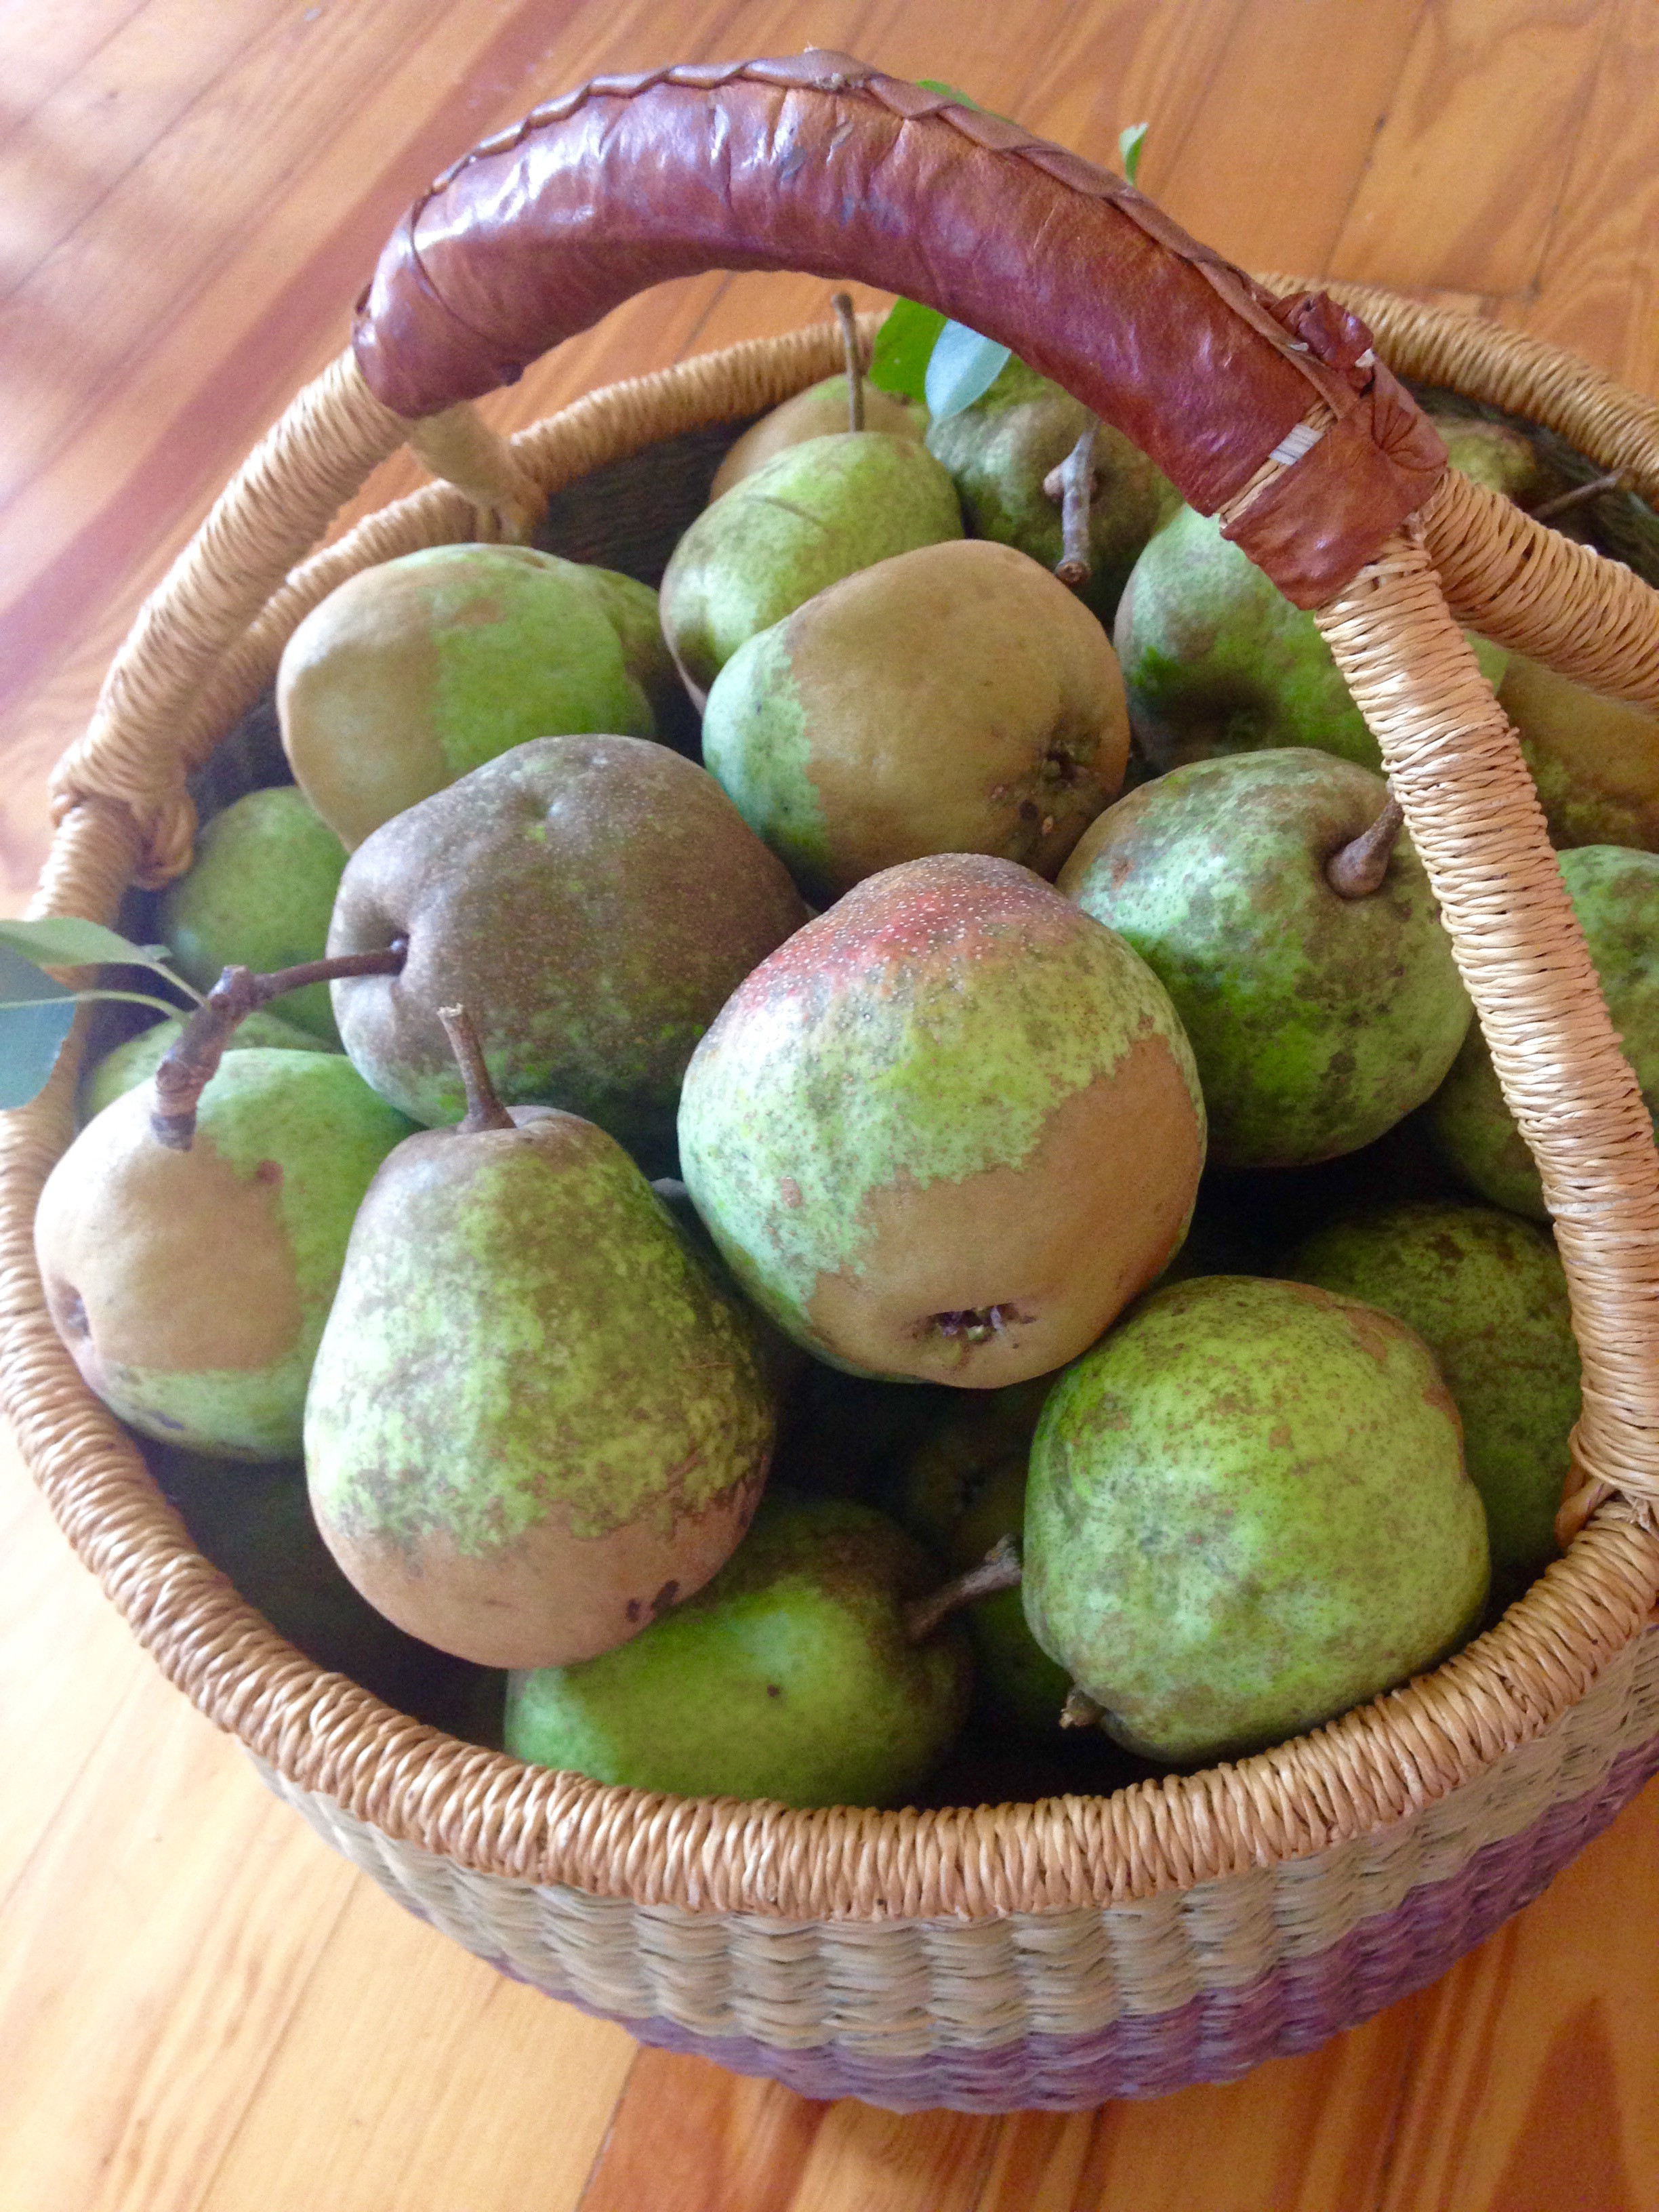
- Pears: Choose firm, slightly underripe pears for the best texture and flavor. Varieties like Anjou, Kieffer, and Bartlett work well.
- Sugar: Granulated sugar is essential for sweetening and preserving the pears. The ratio of sugar to pears is crucial for proper preservation and flavor.
- Lemons: Lemon juice adds acidity, which helps to balance the sweetness and aids in the preservation process. It also enhances the flavor of the pears.
Optional ingredients, such as cinnamon sticks, vanilla beans, or cloves, can add complexity and warmth to the flavor profile. The National Center for Home Food Preservation emphasizes the importance of using high-quality ingredients for safe and delicious preserves.
How do you select the best pears for making preserves?
Selecting the best pears for making preserves involves considering their firmness and ripeness. Look for pears that are firm to the touch, indicating they are slightly underripe. Avoid pears that are too soft or have blemishes. Varieties like Anjou, Kieffer, and Bartlett are excellent choices due to their firm texture and ability to hold their shape during the cooking process. According to the USDA, the best time to harvest pears for preserving is when they are mature but not fully ripe.
3. What Equipment Do I Need to Make Pear Preserves?
To make old fashioned pear preserves, you’ll need the following equipment:
- Large Stainless Steel Pot: Essential for cooking the pears and sugar mixture. Stainless steel is ideal as it doesn’t react with acidic ingredients.
- Canning Jars: Use sterilized canning jars with lids and bands to ensure proper sealing.
- Water Bath Canner: A large pot with a rack used for processing the filled jars to create a vacuum seal.
- Jar Lifter: A tool for safely lifting hot jars out of the water bath canner.
- Ladle: For transferring the hot preserves into the jars.
- Measuring Cups and Spoons: For accurate measurement of ingredients.
A food scale can also be helpful for measuring the pears and sugar in the correct ratio. The Ball Blue Book Guide to Preserving provides detailed information on the necessary equipment and sterilization techniques for safe home canning.
What are the safety precautions when canning pear preserves?
When canning pear preserves, several safety precautions are crucial to prevent spoilage and ensure food safety:
- Sterilize Jars and Lids: Boil jars and lids for 10 minutes to kill any bacteria or mold.
- Use Proper Headspace: Leave the recommended amount of headspace (usually ½ inch) in the jars to allow for expansion during processing.
- Process in a Water Bath Canner: Ensure the jars are fully submerged in boiling water and process for the correct amount of time based on your altitude and the recipe.
- Check Seals: After processing, check that the jars have sealed properly by pressing down on the center of the lid. If it doesn’t flex, the jar is sealed.
- Store Properly: Store sealed jars in a cool, dark place.
The National Center for Home Food Preservation provides comprehensive guidelines for safe canning practices, including processing times and recommended equipment.
4. How Do You Prepare the Pears for Preserving?
To prepare the pears for preserving:
- Wash and Peel: Thoroughly wash the pears and peel them to remove the skin.
- Core: Remove the core using a paring knife or a melon baller.
- Slice: Slice the pears into even, thin slices, about ⅛ inch thick. This helps them cook evenly and absorb the syrup.
- Prevent Browning: Place the sliced pears in a bowl of water with lemon juice or citric acid to prevent browning.
Evenly sliced pears are key to achieving a consistent texture in the final product.
Is there a specific way to slice pears for the best texture?
Yes, slicing pears thinly and evenly is crucial for achieving the best texture in your preserves. Aim for slices that are about ⅛ inch thick. This allows the pears to cook evenly and absorb the syrup properly, resulting in a tender but firm texture. Using a mandoline can help ensure consistent slices. According to culinary experts at the Institute of Culinary Education, uniform slicing contributes significantly to the overall quality of preserves.
5. Can You Explain the Step-by-Step Process of Making Old Fashioned Pear Preserves?
The step-by-step process of making old fashioned pear preserves involves several key stages:
- Maceration: Combine the sliced pears with sugar in a large stainless steel pot. Cover and let them rest overnight. This process draws out the natural juices from the pears, creating a syrup base.
- Cooking: Add lemon slices (½ lemon per 6 cups of pears) to the mixture. Bring the mixture to a high simmer or low boil over medium heat. Stir occasionally to prevent sticking.
- Consistency Check: Cook for about 1 ½ to 3 hours, stirring occasionally. The preserves are done when the pears turn translucent and develop a rose to light garnet color. The syrup should thicken to a honey-like consistency.
- Canning: Ladle the hot preserves into sterilized canning jars, leaving ½ inch of headspace. Wipe the jar rims clean, place the lids on, and secure with bands.
- Processing: Process the filled jars in a water bath canner for 10 minutes (adjust time based on altitude).
- Cooling and Sealing: Remove the jars from the canner and let them cool for 24 hours. Check the seals by pressing on the center of each lid. If the lid doesn’t flex, it’s sealed.
Following these steps carefully ensures a safe and delicious batch of pear preserves.
What is the role of maceration in making pear preserves?
Maceration plays a crucial role in making pear preserves by drawing out the natural juices from the pears and creating a syrup base. When sliced pears are combined with sugar and left to rest overnight, the sugar pulls moisture from the fruit, resulting in a concentrated and flavorful syrup. This process not only enhances the taste of the preserves but also helps to preserve the pears by reducing the water activity, which inhibits microbial growth. According to food science studies, maceration can also improve the texture of the fruit by softening the cell walls.
6. How Do You Know When the Pear Preserves Are Done Cooking?
You know the pear preserves are done cooking when:
- Pear Color: The pears have turned translucent and developed a rose to light garnet color.
- Syrup Consistency: The syrup has thickened to a honey-like consistency.
- Texture: The pears are tender but still hold their shape.
- PawPaw’s Advice: Cook them until they start to get “tough,” meaning they develop a more substantial bite.
Regularly checking the consistency and color of the preserves helps ensure they are cooked to perfection.
What are the visual cues to look for when determining the right consistency?
Visual cues are essential for determining the right consistency of pear preserves. The pears should become translucent and have a slight sheen, indicating they have absorbed the syrup. The syrup itself should thicken and coat the back of a spoon. To test the consistency, place a small spoonful of syrup on a chilled plate and let it cool for a few seconds. If it forms a soft gel, the preserves are ready. Culinary Arts Academy Switzerland emphasizes the importance of using both visual and tactile cues to achieve the perfect consistency in preserves.
7. What are Some Variations on the Classic Pear Preserves Recipe?
Some variations on the classic pear preserves recipe include:
- Spiced Pear Preserves: Add spices like cinnamon sticks, cloves, vanilla bean, or cardamom for a warm, aromatic flavor.
- Ginger Pear Preserves: Incorporate fresh or candied ginger for a spicy and zesty twist.
- Lemon Pear Preserves: Increase the amount of lemon juice and zest for a brighter, more citrusy flavor.
- Honey Pear Preserves: Substitute sugar with honey for a natural sweetener and unique flavor profile.
Experimenting with different flavor combinations can create unique and delicious variations of the classic recipe.
How can you incorporate different spices to enhance the flavor of pear preserves?
Incorporating different spices can significantly enhance the flavor of pear preserves. Cinnamon sticks, cloves, and cardamom add warmth and depth, while ginger provides a spicy and zesty note. Vanilla bean lends a sweet and aromatic flavor. To incorporate spices, add them to the pot along with the pears and sugar during the cooking process. For a more subtle flavor, use a spice sachet that can be removed before canning. According to spice experts at McCormick, the key to successful spice integration is to balance the flavors and use high-quality, fresh spices.
8. How Long Do Homemade Pear Preserves Last?
Homemade pear preserves can last for up to two years when properly canned and stored. To ensure longevity:
- Proper Sealing: Make sure the jars are properly sealed after processing.
- Cool, Dark Storage: Store the sealed jars in a cool, dark place away from direct sunlight.
- Refrigerate After Opening: Once opened, refrigerate the preserves and consume within a few weeks.
Proper canning and storage techniques are crucial for preserving the quality and safety of homemade preserves.
What are the best storage practices to ensure longevity and quality?
The best storage practices to ensure the longevity and quality of homemade pear preserves include:
- Cool, Dark Environment: Store jars in a cool, dark place to prevent spoilage and maintain color.
- Consistent Temperature: Avoid temperature fluctuations, which can affect the seal and quality of the preserves.
- Proper Labeling: Label jars with the date and contents to keep track of their age.
- Inspect Regularly: Check jars periodically for signs of spoilage, such as bulging lids or unusual odors.
Following these storage practices will help maintain the flavor and texture of your pear preserves for up to two years. The University of California, Davis, provides guidelines on proper food storage for optimal quality and safety.
9. What Are Some Creative Ways to Use Pear Preserves?
Pear preserves are incredibly versatile and can be used in a variety of ways:
- Toast and Pastries: Spread on toast, scones, or croissants for a delicious breakfast or snack.
- Cheese Platters: Serve with cheese and crackers as part of a cheese platter.
- Dessert Topping: Use as a topping for ice cream, yogurt, or pancakes.
- Meat Glaze: Glaze roasted meats, such as chicken or pork, for a sweet and savory flavor.
- Baking: Incorporate into muffins, cakes, or pies for added moisture and flavor.
Experimenting with different culinary applications can showcase the unique flavor of pear preserves.
Can you share some unique recipe ideas that incorporate pear preserves?
Here are some unique recipe ideas that incorporate pear preserves:
- Pear Preserve and Brie Grilled Cheese: Combine pear preserves with brie cheese in a grilled cheese sandwich for a sweet and savory treat.
- Pear Preserve Glazed Salmon: Brush salmon fillets with pear preserves before baking for a flavorful and moist dish.
- Pear Preserve and Walnut Muffins: Add pear preserves and chopped walnuts to your favorite muffin recipe for a delicious breakfast treat.
- Pear Preserve Vinaigrette: Whisk pear preserves with olive oil, vinegar, and Dijon mustard for a sweet and tangy salad dressing.
- Pear Preserve and Prosciutto Pizza: Top pizza dough with pear preserves, prosciutto, gorgonzola cheese, and arugula for a gourmet pizza.
These recipes highlight the versatility of pear preserves and how they can enhance both sweet and savory dishes. Food & Wine Magazine features innovative recipes that utilize preserves in creative ways.
10. What are Common Mistakes to Avoid When Making Pear Preserves?
Common mistakes to avoid when making pear preserves include:
- Using Overripe Pears: Overripe pears can result in a mushy texture.
- Inaccurate Sugar Ratio: Not using the correct ratio of sugar to pears can affect the preservation and flavor.
- Insufficient Cooking Time: Under-cooking can lead to spoilage and a thin syrup.
- Improper Sealing: Failing to properly seal the jars can result in contamination and spoilage.
- Neglecting Sterilization: Not sterilizing jars and lids can introduce bacteria or mold.
Avoiding these mistakes will help ensure a successful and safe batch of pear preserves.
What steps can you take to troubleshoot common issues during the preserving process?
To troubleshoot common issues during the preserving process:
- Mushy Texture: If the pears are mushy, use firmer, slightly underripe pears next time.
- Thin Syrup: If the syrup is too thin, cook the preserves longer to allow the syrup to thicken.
- Jars Not Sealing: Ensure the jar rims are clean, the lids are new, and the jars are processed for the correct amount of time.
- Mold Growth: If mold appears, discard the preserves and ensure proper sterilization and sealing in future batches.
Addressing these issues promptly can save your batch of preserves and improve your preserving skills. The USDA Complete Guide to Home Canning offers solutions to common canning problems.
11. How Does Altitude Affect the Canning Process for Pear Preserves?
Altitude affects the canning process for pear preserves because water boils at a lower temperature at higher altitudes. This means that the processing time needs to be increased to ensure proper sterilization and sealing. For example, at altitudes above 1,000 feet, you need to add additional processing time to the water bath canning process.
- 1,001 – 3,000 feet: Add 5 minutes to the processing time.
- 3,001 – 6,000 feet: Add 10 minutes to the processing time.
- 6,001 – 8,000 feet: Add 15 minutes to the processing time.
- 8,001 – 10,000 feet: Add 20 minutes to the processing time.
Adjusting the processing time based on your altitude is crucial for safe and effective canning.
What are the specific adjustments needed for canning at higher altitudes?
The specific adjustments needed for canning at higher altitudes involve increasing the processing time in a water bath canner. The increased processing time compensates for the lower boiling point of water at higher altitudes, ensuring that the jars reach a temperature sufficient to kill harmful microorganisms. The National Center for Home Food Preservation provides detailed altitude adjustment charts for various canning processes.
12. What are the Nutritional Benefits of Pear Preserves?
Pear preserves, while primarily a sweet treat, offer some nutritional benefits:
- Fiber: Pears are a good source of dietary fiber, which aids in digestion.
- Vitamins: Pears contain vitamins C and K, which are important for immune function and blood clotting.
- Antioxidants: Pears are rich in antioxidants, which help protect against cell damage.
- Natural Sugars: Provide a source of energy.
However, it’s important to consume pear preserves in moderation due to their high sugar content.
How can you make pear preserves healthier without compromising taste?
You can make pear preserves healthier without compromising taste by:
- Reducing Sugar: Use less sugar or substitute with natural sweeteners like honey or maple syrup.
- Adding Spices: Incorporate spices like cinnamon or ginger, which have antioxidant and anti-inflammatory properties.
- Using Whole Fruit: Include the pear skin (if organic) for added fiber and nutrients.
- Controlling Portion Sizes: Enjoy preserves in moderation as part of a balanced diet.
These adjustments can enhance the nutritional profile of your pear preserves while maintaining their delicious flavor. The Mayo Clinic offers tips on healthy eating and incorporating fruits into your diet.
13. Can You Use Other Types of Fruit in a Similar Preserves Recipe?
Yes, you can use other types of fruit in a similar preserves recipe. Fruits that work well include:
- Apples: Use firm apples like Granny Smith or Honeycrisp.
- Peaches: Choose ripe but firm peaches.
- Plums: Select plums that are slightly underripe.
- Quinces: Quinces require a longer cooking time but yield a unique and flavorful preserve.
Adjust the sugar and lemon juice levels based on the sweetness and acidity of the fruit.
What fruits are best suited for making old fashioned preserves besides pears?
Besides pears, fruits best suited for making old fashioned preserves include:
- Quinces: Known for their high pectin content, quinces create a naturally thick preserve with a unique flavor.
- Figs: Figs have a naturally sweet and rich flavor that complements the preserving process.
- Apricots: Apricots offer a balance of sweetness and tartness, making them ideal for preserves.
- Berries: Berries like strawberries, raspberries, and blackberries can be used, but they require careful handling to avoid a mushy texture.
Each fruit brings its unique flavor and texture to the preserving process, allowing for a wide range of delicious options. The Joy of Cooking provides detailed recipes for preserving various types of fruit.
14. What are the Differences Between Preserves, Jams, and Jellies?
The differences between preserves, jams, and jellies lie in their texture and ingredients:
- Preserves: Contain whole or large pieces of fruit suspended in a syrup.
- Jams: Made from crushed or chopped fruit, resulting in a thicker, less defined texture.
- Jellies: Made from fruit juice only, creating a clear, smooth spread.
Understanding these distinctions helps in choosing the right type of spread for your culinary needs.
How do these differences affect the texture and flavor of the final product?
These differences significantly affect the texture and flavor of the final product. Preserves offer a chunky texture with distinct pieces of fruit, providing a burst of fresh flavor with each bite. Jams have a smoother, more uniform texture, allowing for a more concentrated and blended flavor. Jellies, with their clear and smooth consistency, provide a delicate and refined flavor experience. The textural differences also influence how these products are used in culinary applications. Fine Cooking Magazine explains how different fruit spreads can enhance various dishes.
15. Is it Possible to Make Pear Preserves Without Using Pectin?
Yes, it is possible to make pear preserves without using pectin. Old fashioned recipes rely on the natural pectin found in the fruit and the concentration of sugar to create a thick, syrupy consistency. Long cooking times help to evaporate excess moisture and intensify the flavor.
What are the natural sources of pectin, and how do they contribute to the preserving process?
Natural sources of pectin include fruits like apples, pears, quinces, and citrus fruits. Pectin is a soluble fiber that acts as a gelling agent, helping to thicken preserves, jams, and jellies. When heated in the presence of sugar and acid, pectin forms a network that traps liquid, creating a firm consistency. Fruits with higher pectin content, such as quinces, are often used in combination with lower-pectin fruits to achieve the desired thickness in preserves. Food science resources at Oregon State University explain the role of pectin in fruit preservation.
16. How Do You Address Common Canning Problems?
Common canning problems and how to address them:
- Siphoning: This is when liquid escapes from the jars during processing. To prevent this, ensure the jars are not overfilled and maintain a consistent boil in the water bath canner.
- Flat Sours: These are caused by under-processing and can lead to spoilage. Ensure you process the jars for the correct amount of time based on your altitude and the recipe.
- Mold Growth: This indicates that the jars were not properly sealed or sterilized. Discard the preserves and ensure proper sterilization and sealing in future batches.
Addressing these issues promptly helps ensure the safety and quality of your canned goods.
What steps should you take if a jar doesn’t seal properly after processing?
If a jar doesn’t seal properly after processing, you have a few options:
- Refrigerate and Use Immediately: Store the jar in the refrigerator and use the preserves within a few days.
- Reprocess: Replace the lid with a new one, ensure the jar rim is clean, and reprocess the jar in a water bath canner for the full processing time.
- Freeze: Transfer the preserves to a freezer-safe container and freeze for later use.
It’s essential to address unsealed jars promptly to prevent spoilage. The USDA Complete Guide to Home Canning provides detailed instructions on handling unsealed jars.
17. Can you freeze pear preserves instead of canning them?
Yes, you can freeze pear preserves instead of canning them. To freeze pear preserves:
- Cool Completely: Allow the preserves to cool completely after cooking.
- Use Freezer-Safe Containers: Transfer the preserves to freezer-safe containers or jars, leaving some headspace for expansion.
- Label and Date: Label the containers with the date and contents.
- Freeze: Freeze for up to one year.
Freezing is a convenient alternative to canning, especially if you don’t have canning equipment or prefer not to process jars.
What are the advantages and disadvantages of freezing versus canning pear preserves?
The advantages of freezing pear preserves include:
- Simplicity: Freezing is a simpler process than canning, requiring less equipment and time.
- Texture: Freezing can preserve the texture of the pears better than canning.
The disadvantages of freezing pear preserves include:
- Freezer Space: Requires freezer space, which may be limited.
- Shorter Shelf Life: Frozen preserves have a shorter shelf life (up to one year) compared to canned preserves (up to two years).
- Texture Changes: Freezing can sometimes alter the texture of the preserves upon thawing.
Canning offers a longer shelf life and doesn’t require freezer space, but it’s a more involved process.
18. How Can I Scale This Recipe for Larger or Smaller Batches?
To scale the pear preserves recipe for larger or smaller batches, maintain the ratio of 2 parts sliced pears to 1 part sugar. Adjust the amount of lemon juice accordingly (½ lemon per 6 cups of sliced pears). Ensure your pot is large enough to accommodate the increased volume without overcrowding. When scaling up, cooking times may need to be adjusted.
What are the considerations when adjusting ingredient quantities?
When adjusting ingredient quantities for pear preserves, consider:
- Sugar Ratio: Maintain the 2:1 ratio of pears to sugar to ensure proper preservation and flavor.
- Lemon Juice: Adjust the amount of lemon juice proportionally to balance the sweetness and aid in preservation.
- Spices: If using spices, adjust their quantities to complement the increased or decreased volume of fruit.
- Cooking Time: Larger batches may require longer cooking times to achieve the desired consistency.
Accurate measurements are crucial for ensuring the quality and safety of your preserves.
19. Where Can I Find High-Quality Canning Supplies?
You can find high-quality canning supplies at:
- Local Hardware Stores: Many hardware stores carry a range of canning jars, lids, and equipment.
- Specialty Kitchen Stores: These stores offer a wide selection of canning supplies and knowledgeable staff who can provide advice.
- Online Retailers: Websites like Amazon and Lehman’s offer a variety of canning supplies and equipment.
- Farmers’ Markets: Some farmers’ markets sell canning jars and supplies during the harvest season.
Choosing reliable suppliers ensures you have the necessary tools for safe and successful canning.
What are the essential features to look for when purchasing canning jars and equipment?
When purchasing canning jars and equipment, look for these essential features:
- Quality Glass: Choose jars made from durable, heat-resistant glass that can withstand the canning process.
- Proper Sealing: Ensure the jars have a tight-fitting lid and band system for proper sealing.
- Durable Canner: Select a water bath canner made from sturdy material with a rack to hold the jars.
- Safe Handling Tools: Invest in jar lifters and lid wands for safe and easy handling of hot jars and lids.
- Accurate Thermometer: Use a reliable thermometer to monitor the temperature of the water bath.
High-quality canning jars and equipment are essential for safe and successful home canning.
20. What are Some Tips for Gifting Homemade Pear Preserves?
Tips for gifting homemade pear preserves:
- Presentation: Use attractive jars and decorate them with ribbons, labels, and personalized tags.
- Pairings: Include suggestions for how to use the preserves, such as serving with cheese or spreading on toast.
- Recipe Card: Add a copy of the recipe for the recipient to try making their own.
- Gift Basket: Create a gift basket with other homemade treats, such as crackers, cheeses, and teas.
A thoughtful presentation enhances the appeal of your homemade gift and shows your care and effort.
Why not explore mens-fashion.net for styling tips to match your gift-giving finesse? From selecting the perfect outfit for a casual gathering to choosing a sophisticated look for a more formal occasion, our site offers inspiration and advice to elevate your personal style.
How can you personalize the presentation of homemade pear preserves for different occasions?
You can personalize the presentation of homemade pear preserves for different occasions by:
- Holiday Themes: Use festive ribbons and labels for holiday gifts.
- Elegant Events: Opt for simple, elegant jars with minimalist tags for formal events.
- Rustic Charm: Use twine and kraft paper labels for a rustic, homemade feel.
- Personalized Messages: Add handwritten notes or personalized tags to each jar.
Tailoring the presentation to the occasion adds a personal touch and makes your gift even more special.
We invite you to explore mens-fashion.net to discover more style guides and tips that complement your passion for creating and sharing homemade treats. Whether you’re looking for the latest trends or timeless classics, we’ve got you covered. Visit us at Address: 227 W 27th St, New York, NY 10001, United States, Phone: +1 (212) 217-5800, Website: mens-fashion.net, and elevate your style today.
Remember PawPaw’s wisdom: good things take time and simple ingredients, just like a well-crafted wardrobe.
FAQ Section
Q1: What kind of pears are best for making old fashioned pear preserves?
Choose firm, slightly underripe pears like Anjou, Kieffer, or Bartlett for the best texture and flavor in your preserves.
Q2: Do I need to peel the pears before making preserves?
Yes, peeling the pears is recommended to achieve a smoother texture in the final product.
Q3: Can I use less sugar in the recipe?
While you can reduce the sugar, remember that sugar is essential for preservation. Reducing it significantly may affect the shelf life and consistency.
Q4: How do I sterilize canning jars properly?
Boil the jars and lids in water for 10 minutes to kill any bacteria or mold before filling them with preserves.
Q5: What is the ideal consistency for pear preserves?
The ideal consistency is when the pears are translucent and the syrup has thickened to a honey-like consistency, coating the back of a spoon.
Q6: How long do I need to process the jars in a water bath canner?
Process the jars for 10 minutes, adjusting the time based on your altitude.
Q7: What should I do if a jar doesn’t seal after processing?
Refrigerate the unsealed jar and use the preserves within a few days, or reprocess the jar with a new lid.
Q8: Can I add spices to pear preserves?
Yes, spices like cinnamon, cloves, or ginger can add a warm and aromatic flavor to your preserves.
Q9: How should I store homemade pear preserves?
Store sealed jars in a cool, dark place away from direct sunlight for up to two years.
Q10: Can I freeze pear preserves instead of canning them?
Yes, you can freeze pear preserves in freezer-safe containers for up to one year.