Are you yearning for a taste of nostalgia with a creamy, melt-in-your-mouth treat? At mens-fashion.net, we understand the desire for simple pleasures, and nothing quite hits the spot like a classic Old Fashioned Peanut Butter Fudge. This recipe is your gateway to creating a delectable dessert that’s both easy to make and incredibly satisfying. Get ready to indulge in the rich flavors and smooth texture of this timeless favorite, perfect for any occasion. Let’s dive into this classic confection, offering you an exceptional confectionery experience.
1. What Makes Old Fashioned Peanut Butter Fudge So Irresistible?
Old fashioned peanut butter fudge is irresistible because of its perfect blend of creamy texture, rich peanut butter flavor, and sweet, comforting taste. According to food historians, fudge recipes became popular in the late 19th century in the United States, offering a delightful treat that quickly became a household favorite.
- Creamy Texture: Unlike some candies that can be hard or brittle, old fashioned peanut butter fudge boasts a smooth, melt-in-your-mouth texture that makes it a joy to eat. The careful balance of ingredients and precise cooking techniques ensure that the fudge isn’t grainy or overly sugary.
- Rich Peanut Butter Flavor: The star of the show is, of course, peanut butter. High-quality peanut butter infuses the fudge with a bold, nutty flavor that is both comforting and satisfying. Its natural oils contribute to the fudge’s creaminess, enhancing the overall sensory experience.
- Sweet and Comforting Taste: The sweetness of the fudge is perfectly balanced with the savory notes of peanut butter. This combination creates a harmonious flavor profile that appeals to a wide range of palates. Each bite evokes a sense of nostalgia, reminiscent of childhood treats and homemade goodness.
- Nostalgic Appeal: Old fashioned recipes carry a sense of tradition and history. Making and enjoying this fudge connects us to simpler times and cherished memories, adding an emotional layer to its appeal.
- Easy to Make: Despite its decadent taste, old fashioned peanut butter fudge requires only a few simple ingredients and minimal equipment. This ease of preparation makes it a popular choice for home cooks looking to create a delicious treat without spending hours in the kitchen.
- Versatile Treat: This fudge can be enjoyed in many ways. It’s perfect as a standalone dessert, a sweet addition to a dessert platter, or even as a thoughtful homemade gift. Its versatility adds to its widespread appeal.
- Perfectly Balanced Sweetness: Too much sugar can make a candy cloying, but old fashioned peanut butter fudge strikes the right balance. The sweetness complements the peanut butter without overpowering it, creating a taste that is indulgent yet not overwhelming.
2. What Are The Key Ingredients For The Perfect Old Fashioned Peanut Butter Fudge Recipe?
The key ingredients for the perfect Old Fashioned Peanut Butter Fudge Recipe include sugar, butter, milk, peanut butter, vanilla extract, and a pinch of salt. Each ingredient plays a vital role in achieving the desired creamy texture and rich flavor.
- Sugar: Sugar is essential for sweetness and structure. Granulated sugar and brown sugar are commonly used. Granulated sugar provides the necessary sweetness and helps create a smooth texture, while brown sugar adds depth of flavor with its molasses content.
- Butter: Butter adds richness, flavor, and a creamy texture. It also helps prevent the fudge from becoming too hard. Use unsalted butter to control the salt content in the recipe.
- Milk: Milk provides moisture and helps dissolve the sugar, creating a smooth base for the fudge. Whole milk is often preferred for its higher fat content, which contributes to a creamier final product.
- Peanut Butter: Peanut butter is the star ingredient, delivering the signature flavor and contributing to the fudge’s creamy consistency. Use creamy peanut butter for the smoothest texture, and choose a high-quality brand for the best flavor.
- Vanilla Extract: Vanilla extract enhances the other flavors and adds a subtle warmth to the fudge. Use pure vanilla extract rather than imitation for the best results.
- Salt: A pinch of salt balances the sweetness and enhances the peanut butter flavor. It also helps to control the overall flavor profile of the fudge, preventing it from being overly sweet.
- Corn Syrup (Optional): Some recipes include a small amount of corn syrup to help prevent sugar crystallization, resulting in an even smoother fudge. If you prefer not to use corn syrup, you can omit it, but be extra careful with the cooking process to avoid crystallization.
- Heavy Cream (Optional): For an extra creamy and rich fudge, some recipes incorporate a small amount of heavy cream. This adds additional fat, which enhances the smoothness and overall texture of the fudge.
- Marshmallow Creme (Optional): Adding marshmallow creme can contribute to a smoother, less grainy texture. Marshmallow creme contains sugar and corn syrup, which help to prevent crystallization.
- Chocolate (Optional): For a variation, consider adding a layer of chocolate to create a chocolate peanut butter fudge. This adds a complementary flavor and visual appeal.
3. How Can I Make Old Fashioned Peanut Butter Fudge On The Stovetop?
Making old fashioned peanut butter fudge on the stovetop requires careful attention to temperature and stirring to achieve the perfect creamy texture. According to the Exploratorium, candy making is a science that relies on precise temperatures to control sugar crystallization.
- Prepare Your Ingredients:
- Gather all your ingredients: sugar (granulated and brown), butter, milk, peanut butter, vanilla extract, and salt.
- Measure each ingredient accurately and have them ready to use.
- Combine Ingredients:
- In a heavy-bottomed saucepan, combine the sugar, butter, milk, and salt.
- Use a heavy-bottomed saucepan to ensure even heat distribution and prevent scorching.
- Cook the Mixture:
- Place the saucepan over medium heat and stir constantly until the sugar is completely dissolved.
- Continue to cook the mixture, stirring occasionally, until it comes to a boil.
- Boil Without Stirring:
- Once the mixture is boiling, stop stirring and let it cook until it reaches the soft-ball stage (235-240°F or 112-115°C) on a candy thermometer.
- Use a candy thermometer to monitor the temperature accurately. Clip it to the side of the pan, ensuring it doesn’t touch the bottom.
- Cool Slightly:
- Remove the saucepan from the heat and let it cool for a few minutes (about 5-10 minutes).
- Cooling it slightly helps prevent the peanut butter from melting too much when added.
- Add Peanut Butter and Vanilla:
- Add the peanut butter and vanilla extract to the saucepan.
- Stir vigorously until the peanut butter is completely melted and the mixture is smooth and well combined.
- Beat the Fudge:
- Pour the fudge mixture into a mixing bowl.
- Using a hand mixer or a wooden spoon, beat the fudge until it starts to thicken and lose its glossy sheen. This may take several minutes.
- Pour into Pan:
- Pour the fudge into the prepared pan and spread it evenly.
- Chill and Cut:
- Let the fudge cool completely at room temperature, then refrigerate for at least 2 hours to set.
- Once the fudge is firm, cut it into small squares.
- Serve and Enjoy:
- Serve the old fashioned peanut butter fudge and enjoy its creamy, rich flavor.
4. Can I Use A Microwave To Prepare My Old Fashioned Peanut Butter Fudge Recipe?
Yes, you can use a microwave to prepare old fashioned peanut butter fudge, but it requires careful monitoring to prevent burning and ensure a smooth texture. According to the Good Housekeeping Institute, microwaving candy can be tricky due to the uneven heating.
- Prepare Your Ingredients:
- Gather all your ingredients: sugar (granulated and brown), butter, milk, peanut butter, vanilla extract, and salt.
- Measure each ingredient accurately and have them ready to use.
- Combine Ingredients:
- In a microwave-safe bowl, combine the sugar, butter, milk, and salt.
- Use a large microwave-safe bowl to prevent the mixture from boiling over.
- Microwave in Intervals:
- Microwave on high for 1 minute, then stir.
- Repeat this process, microwaving in 30-second intervals and stirring after each interval.
- Monitor Consistency:
- Continue microwaving until the mixture is smooth and the sugar is completely dissolved.
- Be careful not to overheat the mixture, as this can cause it to burn or become grainy.
- Add Peanut Butter and Vanilla:
- Once the mixture is smooth, add the peanut butter and vanilla extract.
- Stir until the peanut butter is completely melted and the mixture is well combined.
- Beat the Fudge:
- Let the mixture cool slightly for a few minutes.
- Using a hand mixer or a wooden spoon, beat the fudge until it starts to thicken and lose its glossy sheen.
- Pour into Pan:
- Pour the fudge into the prepared pan and spread it evenly.
- Chill and Cut:
- Let the fudge cool completely at room temperature, then refrigerate for at least 2 hours to set.
- Once the fudge is firm, cut it into small squares.
- Serve and Enjoy:
- Serve the old fashioned peanut butter fudge and enjoy its creamy, rich flavor.
5. Is Using A Stand Mixer Necessary To Make The Best Old Fashioned Peanut Butter Fudge Recipe?
No, using a stand mixer is not necessary to make the best old fashioned peanut butter fudge; you can achieve excellent results with a hand mixer or even a wooden spoon. According to Cook’s Illustrated, the key is to beat the fudge mixture until it thickens and loses its gloss, regardless of the tool used.
- Achieving the Right Consistency:
- The primary goal of beating the fudge is to cool the mixture and encourage sugar crystallization, which gives the fudge its characteristic creamy texture. This can be accomplished with any tool that allows you to stir vigorously.
- Hand Mixer:
- A hand mixer is an excellent alternative to a stand mixer. It provides more power and speed than stirring by hand, making the process quicker and more efficient. Use a hand mixer on medium speed to beat the fudge until it thickens.
- Wooden Spoon:
- If you don’t have a stand mixer or hand mixer, a wooden spoon will work just fine. Be prepared for a bit of an arm workout, as you’ll need to stir vigorously and continuously until the fudge reaches the desired consistency.
- Key Indicators of Readiness:
- Regardless of the tool you use, the key is to watch for the right signs. The fudge is ready when it starts to thicken and loses its glossy sheen. It should become less runny and more like a thick paste.
- Advantages of a Stand Mixer:
- A stand mixer offers the advantage of freeing up your hands, allowing you to attend to other tasks while the fudge is being beaten. It also provides consistent speed and power, which can result in a more uniform texture.
- Even Cooling:
- Whether you use a stand mixer, hand mixer, or wooden spoon, ensure that the fudge cools evenly while being beaten. This helps to prevent the formation of large sugar crystals, which can make the fudge grainy.
- Adjusting Beating Time:
- The amount of time you need to beat the fudge will depend on the temperature of the mixture and the tool you’re using. Keep a close eye on the consistency and adjust the beating time accordingly.
6. How Do I Keep My Old Fashioned Peanut Butter Fudge From Being Grainy?
To prevent old fashioned peanut butter fudge from being grainy, ensure the sugar is fully dissolved, avoid stirring after boiling, use a candy thermometer for accurate temperature, and beat the mixture properly as it cools. According to the National Confectioners Association, controlling sugar crystallization is crucial for smooth fudge.
- Dissolve Sugar Completely:
- Before the mixture comes to a boil, make sure the sugar is completely dissolved. Undissolved sugar crystals can act as seeds, causing the fudge to become grainy. Stir the mixture constantly over medium heat until the sugar is fully dissolved.
- Avoid Stirring After Boiling:
- Once the mixture starts to boil, stop stirring. Stirring can cause sugar crystals to form on the sides of the pan, which can then fall back into the mixture and cause graininess.
- Use a Candy Thermometer:
- Accuracy in temperature is crucial. Use a candy thermometer to ensure the mixture reaches the soft-ball stage (235-240°F or 112-115°C). Under or overcooking can both lead to grainy fudge.
- Cool Slightly Before Adding Peanut Butter:
- After removing the mixture from the heat, let it cool slightly (about 5-10 minutes) before adding the peanut butter and vanilla. This helps prevent the peanut butter from becoming oily and separating.
- Beat the Mixture Properly:
- Beating the fudge as it cools is essential for creating the right texture. Beat the mixture with a hand mixer or wooden spoon until it thickens and loses its glossy sheen. This process encourages the formation of small sugar crystals, resulting in a smooth, creamy fudge.
- Use High-Quality Ingredients:
- Using high-quality ingredients, especially peanut butter, can make a difference. Choose a creamy peanut butter with a smooth consistency.
- Avoid Seeding:
- Seeding occurs when sugar crystals are introduced into the mixture prematurely. To avoid this, ensure your equipment is clean and free of sugar crystals. Don’t scrape down the sides of the pan after the mixture has started boiling.
- Add Corn Syrup (Optional):
- A small amount of corn syrup can help prevent sugar crystallization. If you choose to use it, add it along with the sugar and milk at the beginning of the recipe.
- Proper Storage:
- Store the fudge in an airtight container at room temperature or in the refrigerator. Improper storage can cause the fudge to dry out or become grainy over time.
7. What Is The Best Way To Store Old Fashioned Peanut Butter Fudge?
The best way to store old fashioned peanut butter fudge is in an airtight container at room temperature or in the refrigerator to maintain its creamy texture and prevent it from drying out. According to the USDA, proper storage is essential to preserve the quality of homemade candies.
- Airtight Container:
- The most important aspect of storing fudge is to keep it in an airtight container. This prevents air from drying out the fudge and helps maintain its creamy texture.
- Room Temperature Storage:
- Fudge can be stored at room temperature for about 1-2 weeks if properly sealed. Keep it in a cool, dry place away from direct sunlight.
- Refrigeration:
- If you prefer to store your fudge for a longer period, refrigerate it. Storing fudge in the refrigerator can extend its shelf life to about 2-3 weeks. However, refrigeration can sometimes cause the fudge to become slightly harder, so allow it to come to room temperature for a few minutes before serving for a softer texture.
- Layering:
- When storing multiple layers of fudge in a container, place a sheet of parchment paper or wax paper between the layers to prevent them from sticking together.
- Freezing:
- For long-term storage, fudge can be frozen. Wrap the fudge tightly in plastic wrap, then place it in an airtight freezer-safe container or freezer bag. Frozen fudge can last for 2-3 months. Thaw it in the refrigerator overnight before serving.
- Avoid Humidity:
- Humidity can affect the texture of fudge, causing it to become sticky or grainy. Store the fudge in a dry environment and avoid storing it in areas with high humidity.
- Proper Sealing:
- Ensure the container is properly sealed to prevent any air or moisture from getting in. If using a freezer bag, press out as much air as possible before sealing.
- Serving:
- When ready to serve, take out only the amount of fudge you plan to eat and reseal the container immediately to maintain the freshness of the remaining fudge.
8. Can I Freeze My Old Fashioned Peanut Butter Fudge Recipe?
Yes, you can freeze old fashioned peanut butter fudge to extend its shelf life; proper wrapping and storage are key to maintaining its texture and flavor. According to the National Center for Home Food Preservation, freezing fudge can be an effective way to preserve it for later enjoyment.
-
Preparation for Freezing:
- Cool Completely: Before freezing, ensure the fudge has cooled completely and is firm.
- Cut into Pieces: Cut the fudge into serving-size pieces before freezing. This makes it easier to thaw only what you need.
-
Wrapping:
- Wrap Tightly: Wrap each piece of fudge individually in plastic wrap. This provides a barrier against freezer burn and helps maintain the fudge’s moisture.
- Double Layer: For added protection, wrap the plastic-wrapped fudge pieces again in aluminum foil.
-
Storage Container:
- Airtight Container: Place the wrapped fudge pieces in an airtight, freezer-safe container or a heavy-duty freezer bag.
- Remove Air: If using a freezer bag, press out as much air as possible before sealing to prevent freezer burn.
-
Freezing Time:
- Optimal Time: Fudge can be stored in the freezer for 2-3 months without significant loss of quality.
- Label and Date: Label the container with the date so you know when it was frozen.
-
Thawing:
- Thaw in Refrigerator: When ready to eat, thaw the fudge in the refrigerator overnight. This allows it to thaw slowly and helps maintain its texture.
- Avoid Quick Thawing: Avoid thawing at room temperature or in the microwave, as this can cause the fudge to become soft and sticky.
-
Serving:
- Serve Cold or at Room Temperature: Once thawed, the fudge can be served cold or allowed to sit at room temperature for a few minutes to soften slightly.
-
Considerations:
- Texture Changes: Freezing may slightly alter the texture of the fudge, making it a bit more crumbly. However, the taste should remain the same.
- Proper Wrapping: Proper wrapping is crucial to prevent freezer burn and maintain the fudge’s quality.
9. Are There Any Variations I Can Make To My Old Fashioned Peanut Butter Fudge Recipe?
Yes, there are several delicious variations you can make to your old fashioned peanut butter fudge recipe, allowing you to customize the flavor and texture to your liking. According to the Food Network, experimenting with flavors can elevate classic recipes.
-
Chocolate Peanut Butter Fudge:
- Add Chocolate: Melt semi-sweet or dark chocolate and swirl it into the peanut butter fudge mixture before it sets.
- Layered Fudge: Create a layered effect by pouring half of the peanut butter fudge into the pan, then adding a layer of melted chocolate, followed by the remaining peanut butter fudge.
-
Peanut Butter Chocolate Chip Fudge:
- Add Chocolate Chips: Stir in chocolate chips (milk, dark, or semi-sweet) into the fudge mixture after beating it. The chocolate chips add a delightful texture and extra chocolate flavor.
-
Maple Peanut Butter Fudge:
- Substitute Maple Syrup: Replace some of the sugar with maple syrup for a rich, warm flavor. Start by substituting about 1/4 to 1/2 cup of the sugar with maple syrup and adjust to taste.
-
Peanut Butter Swirl Fudge:
- Swirl in Peanut Butter: Reserve some peanut butter and swirl it into the top of the fudge after pouring it into the pan. Use a knife or toothpick to create a marbled effect.
-
Salted Peanut Butter Fudge:
- Add Sea Salt: Sprinkle a pinch of sea salt on top of the fudge after pouring it into the pan. The salt enhances the sweetness and peanut butter flavor.
-
Peanut Butter Cookie Dough Fudge:
- Add Cookie Dough: Incorporate small pieces of edible cookie dough into the fudge mixture. This adds a fun and delicious twist.
-
Marshmallow Peanut Butter Fudge:
- Add Marshmallow Creme: Stir in marshmallow creme into the fudge mixture after beating it. This makes the fudge extra creamy and sweet.
-
Nutty Peanut Butter Fudge:
- Add Nuts: Incorporate chopped nuts, such as peanuts, walnuts, or pecans, into the fudge mixture for added texture and flavor.
-
Peanut Butter Pretzel Fudge:
- Add Pretzels: Stir in crushed pretzels into the fudge mixture for a salty and crunchy contrast.
-
Espresso Peanut Butter Fudge:
- Add Espresso Powder: Add a teaspoon or two of espresso powder to the fudge mixture for a coffee-infused flavor.
10. What Are The Common Mistakes To Avoid When Making Old Fashioned Peanut Butter Fudge?
Common mistakes to avoid when making old fashioned peanut butter fudge include not dissolving the sugar completely, stirring the mixture while boiling, inaccurate temperature readings, and improper beating. According to baking experts, these errors can lead to grainy, oily, or otherwise imperfect fudge.
-
Not Dissolving the Sugar Completely:
- Mistake: Failing to dissolve the sugar fully before the mixture comes to a boil.
- Solution: Stir the sugar and milk mixture constantly over medium heat until the sugar crystals are completely dissolved. Ensure there are no sugar granules at the bottom of the pan.
-
Stirring the Mixture While Boiling:
- Mistake: Stirring the mixture after it has begun to boil.
- Solution: Once the mixture starts boiling, stop stirring. Stirring can cause sugar crystals to form on the sides of the pan, leading to graininess.
-
Inaccurate Temperature Readings:
- Mistake: Not using a candy thermometer or using one that is not accurate.
- Solution: Use a reliable candy thermometer to monitor the temperature. Ensure the thermometer is properly calibrated and that it doesn’t touch the bottom of the pan. The mixture should reach the soft-ball stage (235-240°F or 112-115°C).
-
Improper Beating:
- Mistake: Not beating the fudge mixture long enough or beating it too much.
- Solution: Beat the fudge mixture with a hand mixer or wooden spoon until it thickens and loses its glossy sheen. This process is crucial for creating the right texture. Avoid over-beating, which can make the fudge dry.
-
Adding Peanut Butter Too Soon:
- Mistake: Adding peanut butter while the mixture is too hot.
- Solution: Remove the mixture from the heat and let it cool slightly (about 5-10 minutes) before adding the peanut butter and vanilla. This helps prevent the peanut butter from becoming oily and separating.
-
Using the Wrong Type of Peanut Butter:
- Mistake: Using natural peanut butter with oils that separate or chunky peanut butter.
- Solution: Use creamy, processed peanut butter for the smoothest texture. Avoid natural peanut butter, as the separated oils can affect the fudge’s consistency.
-
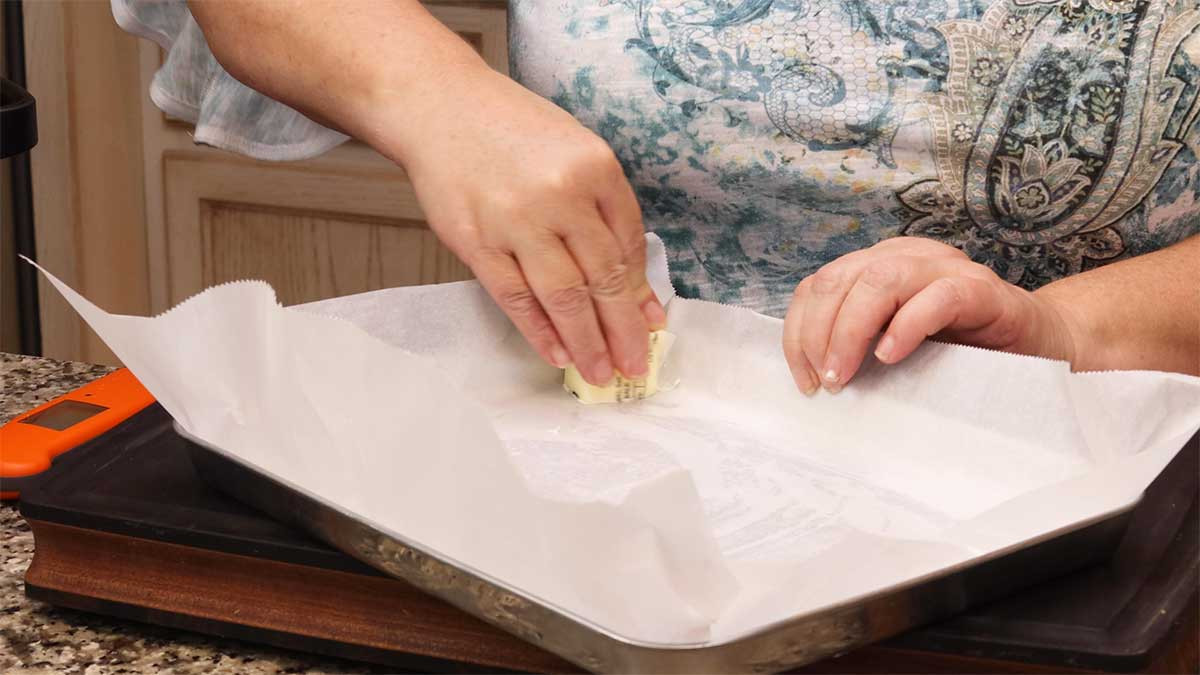
Not Preparing the Pan Properly:
- Mistake: Not lining the pan or greasing it adequately.
- Solution: Line the pan with parchment paper, leaving an overhang on the sides. This makes it easy to lift the fudge out of the pan once it has set.
-
Rushing the Cooling Process:
- Mistake: Trying to cut the fudge before it has cooled completely.
- Solution: Allow the fudge to cool completely at room temperature, then refrigerate for at least 2 hours to set. This ensures it is firm enough to cut neatly.
-
Ignoring Humidity:
- Mistake: Making fudge on a humid day without adjusting the recipe.
- Solution: Humidity can affect the outcome of fudge. On humid days, consider cooking the mixture to a slightly higher temperature (about 240-245°F or 115-118°C) to compensate for the extra moisture.
-
Overcooking the Mixture:
- Mistake: Cooking the mixture beyond the soft-ball stage.
- Solution: Overcooking can result in hard, brittle fudge. Use a candy thermometer to ensure the mixture reaches the correct temperature (235-240°F or 112-115°C) and remove it from the heat immediately once it does.
Indulge in the timeless pleasure of old fashioned peanut butter fudge with our expertly crafted guide at mens-fashion.net. From stovetop secrets to microwave magic and creative variations, we’ve covered everything you need to create the perfect batch every time. Ready to elevate your treat-making game?
For more delicious recipes and style inspiration, visit mens-fashion.net today!
Address: 227 W 27th St, New York, NY 10001, United States
Phone: +1 (212) 217-5800
Website: mens-fashion.net
Frequently Asked Questions About Old Fashioned Peanut Butter Fudge
-
Can I use natural peanut butter for old fashioned peanut butter fudge?
- While possible, natural peanut butter can result in a grainy or oily fudge due to its higher oil content. For best results, use processed creamy peanut butter.
-
How long does it take for peanut butter fudge to set?
- Typically, peanut butter fudge needs to cool at room temperature for a couple of hours and then chill in the refrigerator for at least 2 hours to fully set.
-
What causes my peanut butter fudge to be too soft?
- Peanut butter fudge can be too soft if it’s undercooked, if the weather is humid, or if the ratio of liquid to solids is too high. Ensure accurate temperature and adjust for humidity.
-
Can I add nuts to peanut butter fudge?
- Yes, you can add nuts to peanut butter fudge. Stir in chopped nuts like peanuts, walnuts, or pecans after beating the fudge for added texture and flavor.
-
How do I prevent my peanut butter fudge from sticking to the pan?
- To prevent sticking, line your pan with parchment paper, leaving an overhang. You can also lightly grease the pan before lining it with parchment paper.
-
What is the best temperature to cook peanut butter fudge to?
- The best temperature to cook peanut butter fudge to is the soft-ball stage, which is between 235-240°F (112-115°C).
-
Why is my peanut butter fudge crumbly?
- Peanut butter fudge can be crumbly if it’s overcooked, has too little moisture, or wasn’t beaten enough. Ensure accurate temperature and proper beating.
-
Can I use a glass pan for making peanut butter fudge?
- Yes, you can use a glass pan, but be cautious as glass retains heat. It’s best to line the pan with parchment paper to prevent sticking.
-
How can I make my peanut butter fudge more chocolatey?
- To make your peanut butter fudge more chocolatey, swirl melted chocolate into the fudge mixture or add a layer of melted chocolate between layers of peanut butter fudge.
-
Is it necessary to use a candy thermometer when making peanut butter fudge?
- While it’s possible to make fudge without a thermometer, using one is highly recommended for accuracy. It ensures the fudge reaches the correct temperature for the best texture.