Craving a taste of nostalgia? Old Fashioned Fudge Recipe With Evaporated Milk And Cocoa delivers a rich, decadent treat perfect for any occasion. At mens-fashion.net, we’re not just about style; we appreciate the finer things in life, including classic confections. This guide explores everything you need to know about making the best fudge, from ingredients to techniques, ensuring a successful and delicious outcome every time. Get ready to impress your friends and family with this timeless dessert.
1. What Makes an Old Fashioned Fudge Recipe with Evaporated Milk and Cocoa Special?
An old fashioned fudge recipe with evaporated milk and cocoa offers a unique depth of flavor and creamy texture that sets it apart. The use of evaporated milk lends a richness and smoothness, while cocoa provides a deep chocolate flavor without the need for fancy chocolates.
- Classic Appeal: This recipe evokes a sense of nostalgia, reminiscent of homemade treats from simpler times.
- Rich Flavor: The combination of cocoa and evaporated milk creates a deeply satisfying chocolate experience.
- Creamy Texture: Evaporated milk helps prevent the fudge from becoming grainy, ensuring a smooth, melt-in-your-mouth consistency.
- Simplicity: Often, these recipes require fewer ingredients and simpler techniques compared to modern variations.
- Adaptability: The basic recipe can be customized with nuts, extracts, or other flavorings to suit individual preferences.
2. What Are The Key Ingredients For Old Fashioned Fudge Recipe with Evaporated Milk And Cocoa?
The key to a perfect old fashioned fudge recipe with evaporated milk and cocoa lies in the quality and proportions of its ingredients. Each component plays a crucial role in achieving the desired texture and flavor.
| Ingredient | Role | Notes |
|---|---|---|
| Granulated Sugar | Provides sweetness and structure. | Use fine granulated sugar for best results. |
| Evaporated Milk | Adds richness, creaminess, and helps prevent graininess. | Use full-fat evaporated milk for the creamiest texture. |
| Unsweetened Cocoa | Provides the chocolate flavor. | High-quality Dutch-processed cocoa will offer a deeper, smoother chocolate flavor. |
| Butter | Adds richness, flavor, and contributes to a smooth texture. | Use real butter, not margarine. Salted butter can be used, but reduce the amount of added salt. |
| Salt | Enhances the flavors and balances the sweetness. | A pinch of salt is essential; don’t skip it. |
| Vanilla Extract | Enhances the chocolate flavor and adds a touch of warmth. | Use pure vanilla extract for the best flavor. |
| Corn Syrup (Optional) | Prevents sugar crystallization and ensures a smooth texture. | Some recipes include corn syrup for an extra insurance against graininess. |
| Nuts (Optional) | Adds texture and flavor (e.g., walnuts, pecans). | Toast nuts before adding to enhance their flavor. |
| Marshmallow Creme (Optional) | Adds extra creaminess and sweetness. | It helps to create a smooth and soft fudge texture. |
3. What Equipment Do You Need To Make Old Fashioned Fudge with Evaporated Milk And Cocoa?
Having the right equipment on hand can make the fudge-making process smoother and more successful. These are some essentials for an old fashioned fudge recipe with evaporated milk and cocoa:
- Heavy-Bottomed Saucepan: Ensures even heat distribution and prevents scorching.
- Candy Thermometer: Crucial for monitoring the temperature accurately. According to the National Center for Home Food Preservation, using a candy thermometer is the most reliable way to ensure your fudge reaches the correct consistency.
- Wooden Spoon or Heat-Resistant Spatula: For stirring the fudge mixture.
- Square Baking Pan: Typically an 8×8 or 9×9 inch pan, lined with parchment paper.
- Measuring Cups and Spoons: For accurate ingredient measurements.
- Parchment Paper: For lining the pan, making it easy to remove the fudge.
- Mixing Bowls: For preparing any add-ins like nuts.
- Knife or Pizza Cutter: For cutting the fudge into squares.
4. What Are The Step-By-Step Instructions For Making Old Fashioned Fudge?
Follow these step-by-step instructions to create a perfect batch of old fashioned fudge with evaporated milk and cocoa:
- Prepare the Pan: Line an 8×8 or 9×9 inch square baking pan with parchment paper, leaving an overhang on the sides. This makes it easy to lift the fudge out later.
- Combine Ingredients: In a heavy-bottomed saucepan, combine the granulated sugar, evaporated milk, cocoa powder, salt, and corn syrup (if using). Stir well to ensure the cocoa powder is fully incorporated.
- Cook the Mixture: Place the saucepan over medium heat and stir continuously until the sugar is dissolved. Once the sugar is dissolved, stop stirring and insert a candy thermometer.
- Reach Soft-Ball Stage: Cook the mixture, without stirring, until it reaches the soft-ball stage (235-240°F or 112-115°C). This is a critical step for achieving the right consistency.
- Cool Slightly: Remove the saucepan from the heat and let it cool slightly, without stirring, until the temperature drops to around 110°F (43°C). This may take about 30-45 minutes.
- Add Butter and Vanilla: Once cooled, add the butter and vanilla extract to the saucepan. Do not stir. Let the butter soften for a few minutes.
- Beat the Fudge: Using a wooden spoon or heat-resistant spatula, beat the mixture vigorously until it loses its glossy sheen and starts to thicken. This step is crucial for achieving a creamy texture. Be careful not to overbeat, as this can make the fudge dry and crumbly.
- Incorporate Add-ins: If adding nuts or other flavorings, gently fold them into the fudge mixture.
- Pour into Pan: Pour the fudge mixture into the prepared baking pan and spread it evenly.
- Cool and Set: Let the fudge cool completely at room temperature for several hours, or preferably overnight. This allows the fudge to set properly.
- Cut and Serve: Once the fudge is firm, lift it out of the pan using the parchment paper overhang. Place it on a cutting board and use a sharp knife or pizza cutter to cut it into squares.
5. How Do You Customize Your Old Fashioned Fudge?
One of the great things about old fashioned fudge recipe with evaporated milk and cocoa is its versatility. There are countless ways to customize the recipe to suit your taste preferences.
- Nuts: Add chopped walnuts, pecans, almonds, or hazelnuts for a crunchy texture and nutty flavor. Toast the nuts before adding them to enhance their flavor.
- Extracts: Experiment with different extracts like peppermint, almond, or orange to add a unique twist to the chocolate flavor.
- Dried Fruits: Mix in chopped dried cranberries, cherries, or apricots for a chewy texture and fruity sweetness.
- Spices: Add a pinch of cinnamon, nutmeg, or cayenne pepper for a warm, spicy kick.
- Chocolate Chips: Fold in chocolate chips (milk, dark, or white) for extra chocolatey goodness.
- Peanut Butter: Swirl in peanut butter for a classic chocolate and peanut butter combination.
6. What Are Some Common Mistakes to Avoid When Making Fudge?
Making fudge can be tricky, and there are several common mistakes that can lead to a less-than-perfect result. Here are some pitfalls to avoid when making old fashioned fudge recipe with evaporated milk and cocoa:
- Not Using a Candy Thermometer: Relying on visual cues alone can be unreliable. A candy thermometer ensures you reach the precise temperature needed for proper setting.
- Inaccurate Temperature Readings: Make sure your candy thermometer is accurate. Test it by placing it in boiling water; it should read 212°F (100°C) at sea level. Adjust for altitude if necessary.
- Stirring During Cooking: Once the sugar is dissolved, avoid stirring the mixture as it cooks. Stirring can cause sugar crystals to form, resulting in grainy fudge.
- Not Cooling Enough Before Beating: Cooling the fudge mixture to around 110°F (43°C) before beating is crucial. If you beat it while it’s too hot, it can become grainy.
- Overbeating: Beating the fudge too much can also lead to a dry, crumbly texture. Beat just until it loses its glossy sheen and starts to thicken.
- Incorrect Pan Size: Using a pan that is too large or too small can affect the thickness and setting of the fudge. Stick to the recommended pan size.
7. How Can You Troubleshoot Fudge That Didn’t Set Properly?
Sometimes, despite your best efforts, fudge may not set properly. Here’s how to troubleshoot common issues:
- Fudge is Too Soft: If the fudge is too soft, it likely didn’t reach a high enough temperature during cooking. You can try reheating the mixture to the soft-ball stage (235-240°F or 112-115°C), cooling it to 110°F (43°C), and beating it again.
- Fudge is Grainy: Grainy fudge is often caused by sugar crystals forming during cooking. This can happen if you stirred the mixture after the sugar dissolved, or if there were undissolved sugar crystals on the sides of the pan. Unfortunately, grainy fudge is difficult to fix.
- Fudge is Dry and Crumbly: Overbeating the fudge can cause it to become dry and crumbly. There isn’t much you can do to fix this, but you can try adding a little bit of milk or cream to the mixture and beating it again.
8. What Are The Best Storage Practices For Homemade Fudge?
Proper storage is essential to maintain the quality and freshness of your homemade fudge.
- Room Temperature: Store fudge in an airtight container at room temperature. It will typically last for 1-2 weeks.
- Refrigerator: For longer storage, you can store fudge in the refrigerator. Wrap it tightly in plastic wrap and then place it in an airtight container. It will last for 2-3 weeks in the fridge.
- Freezer: Fudge can also be frozen for up to 2-3 months. Wrap it tightly in plastic wrap and then place it in a freezer-safe container or bag. Thaw it in the refrigerator before serving.
9. How Can You Incorporate Fudge Into Fashion & Style?
While it might seem unusual, fudge can inspire fashion and style in subtle yet creative ways.
- Color Palette: The rich, dark brown of chocolate fudge can be a sophisticated color choice for clothing and accessories. Pair it with creams, beiges, or even pops of jewel tones for a stylish look.
- Texture Inspiration: The smooth, creamy texture of fudge can inspire the choice of fabrics like velvet, suede, or cashmere.
- Themed Events: For themed parties or events, you could create a “chocolate” inspired outfit using various shades of brown and accessorizing with metallic gold or bronze accents.
- Gifting: Homemade fudge makes a thoughtful and stylish gift for friends and family, especially during the holidays.
10. What are the Nutritional Considerations When Indulging in Fudge?
While fudge is a delicious treat, it’s important to be mindful of its nutritional content. Fudge is typically high in sugar, fat, and calories, so it’s best enjoyed in moderation.
| Nutrient | Amount per Serving (approximate) | Notes |
|---|---|---|
| Calories | 150-200 | Varies depending on the recipe and serving size. |
| Sugar | 20-30 grams | A significant portion of the calories comes from sugar. |
| Fat | 5-10 grams | Primarily saturated fat from butter and evaporated milk. |
| Sodium | 50-100 mg | Can vary depending on whether salted or unsalted butter is used. |
| Carbohydrates | 25-35 grams | Mostly from sugar; contributes to the overall sweetness and energy content. |
Here are some tips for making fudge a slightly healthier indulgence:
- Use High-Quality Cocoa: High-quality cocoa powder can provide more antioxidants.
- Reduce Sugar: Experiment with reducing the amount of sugar in the recipe, but be aware that it may affect the texture.
- Add Nuts: Nuts provide healthy fats, protein, and fiber, which can help balance the sweetness.
- Control Portion Sizes: Enjoy fudge in small, mindful portions to savor the flavor without overindulging.
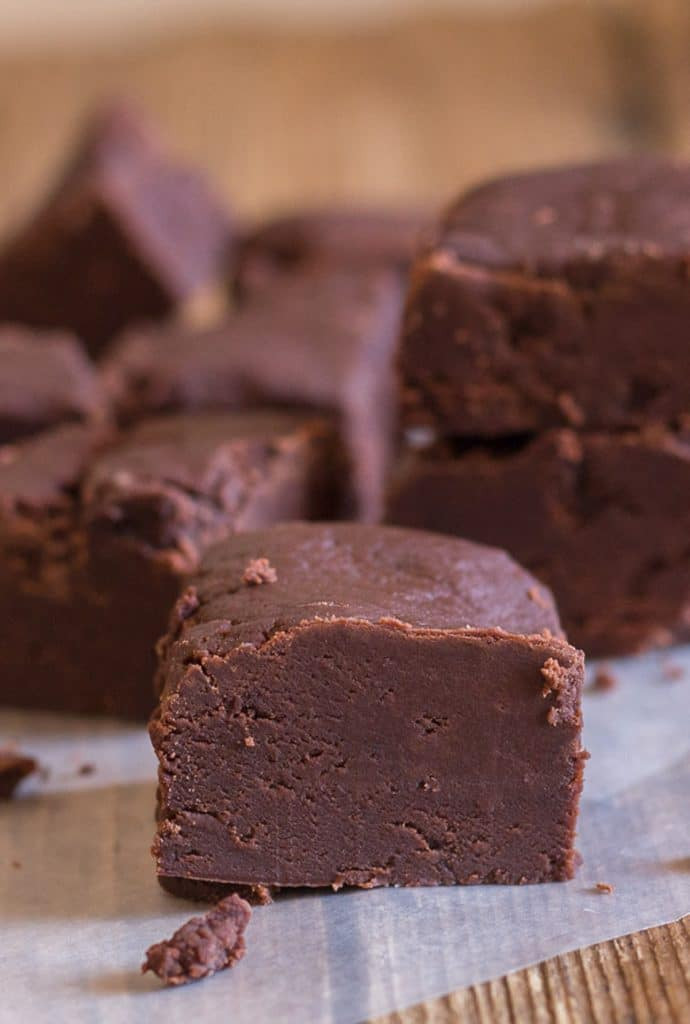 Fudge on a plate
11. Why is Temperature Control Crucial in Making Fudge?
Temperature control is paramount when crafting an old fashioned fudge recipe with evaporated milk and cocoa. The temperature dictates the sugar crystallization process, which directly impacts the fudge’s texture.
- Soft Ball Stage: Reaching the soft ball stage (235-240°F or 118-115°C) is essential. At this temperature, the sugar concentration is just right to form a smooth, creamy fudge.
- Avoid Graininess: If the temperature is too low, the fudge may not set properly and can be too soft. If the temperature is too high, excessive sugar crystallization can occur, leading to a grainy texture.
- Thermometer Accuracy: Using an accurate candy thermometer is non-negotiable. A slight deviation can drastically alter the outcome. Periodically calibrate your thermometer for consistent results.
- Consistent Heating: Ensure even heating by using a heavy-bottomed saucepan. This prevents hot spots that can lead to uneven cooking and crystallization.
12. Can You Substitute Ingredients in Old Fashioned Fudge Recipes?
While the classic old fashioned fudge recipe with evaporated milk and cocoa relies on specific ingredients, some substitutions can be made with careful consideration.
| Original Ingredient | Possible Substitution | Notes |
|---|---|---|
| Evaporated Milk | Heavy Cream | Will result in a richer, denser fudge. May need slight adjustments to cooking time. |
| Unsweetened Cocoa | Dutch-Processed Cocoa | Dutch-processed cocoa has a smoother, less acidic flavor. |
| Butter | Coconut Oil | Will alter the flavor profile. Use refined coconut oil to minimize coconut taste. |
| Granulated Sugar | Brown Sugar | Will impart a molasses flavor and a slightly softer texture. |
| Vanilla Extract | Other Extracts (Almond, etc.) | Experiment with different flavor profiles, but use extracts sparingly as they can be potent. |
- Impact on Texture: Be aware that substitutions can affect the final texture of the fudge. Some substitutions may require adjustments to cooking times or techniques.
- Flavor Alterations: Substituting ingredients will inevitably change the flavor profile. Consider how the new flavor will complement the other ingredients.
13. What are Variations of Old Fashioned Fudge Recipes?
The basic old fashioned fudge recipe with evaporated milk and cocoa serves as a canvas for numerous variations. Here are a few popular twists:
- Peanut Butter Fudge: Swirl peanut butter into the fudge mixture after cooking for a classic flavor combination.
- Rocky Road Fudge: Add marshmallows and chopped nuts to the fudge for a delightful textural contrast.
- Peppermint Fudge: Incorporate peppermint extract and crushed peppermint candies for a festive holiday treat.
- Maple Walnut Fudge: Use maple extract and chopped walnuts for a warm, autumnal flavor.
- Salted Caramel Fudge: Drizzle caramel sauce and sprinkle sea salt over the fudge for a sweet and salty indulgence.
- Espresso Fudge: Add espresso powder for a coffee-infused delight.
14. How Does Altitude Affect Fudge Making and How to Adjust?
Altitude significantly affects fudge making because it alters the boiling point of liquids. At higher altitudes, water boils at a lower temperature, which means fudge cooks faster.
- Temperature Adjustment: For every 500 feet above sea level, decrease the target temperature by 1°F. For example, if you’re 3,000 feet above sea level, reduce the target temperature by 6°F. According to a study by Colorado State University Extension, adjusting the cooking temperature is crucial for successful candy making at high altitudes.
- Cooking Time: You may need to shorten the cooking time to prevent the fudge from becoming too dry or grainy.
- Humidity: High altitude areas often have lower humidity, which can cause fudge to dry out more quickly. Consider adding a tablespoon of corn syrup to help retain moisture.
- Test Batch: It’s always a good idea to make a small test batch to gauge how the altitude affects your fudge recipe.
15. What are Some Tips for Gifting Homemade Fudge?
Homemade fudge makes a thoughtful and impressive gift. Here are some tips for presenting your fudge in style:
- Packaging: Use decorative tins, boxes, or cellophane bags to package the fudge.
- Presentation: Arrange the fudge pieces neatly and consider adding a ribbon or tag for a personal touch.
- Variety: Include a variety of fudge flavors in your gift for a more impressive presentation.
- Storage Instructions: Include a card with storage instructions to ensure the recipient enjoys the fudge at its best.
- Personalized Labels: Create personalized labels with the recipient’s name and the date the fudge was made.
16. What Kind of Cocoa Powder is Best for Old Fashioned Fudge?
The type of cocoa powder you use can significantly impact the flavor and texture of your old fashioned fudge recipe with evaporated milk and cocoa. Here’s a breakdown:
- Natural Cocoa Powder: This cocoa powder is acidic and has a strong, pronounced chocolate flavor. It’s often used in recipes that call for baking soda, as the two react to create leavening.
- Dutch-Processed Cocoa Powder: This cocoa powder is treated with an alkaline solution to neutralize its acidity. It has a milder, smoother flavor and a darker color. It’s often preferred for fudge because it results in a less bitter taste.
- Black Cocoa Powder: This is a highly processed cocoa powder with a very dark color and a slightly bitter flavor. It’s often used to create a dramatic look in baked goods, but it’s not ideal for fudge unless you’re looking for a very intense chocolate flavor.
17. How Do You Prevent a Grainy Texture in Fudge?
Achieving a smooth, creamy texture is the hallmark of perfect fudge. Here are some tips to prevent a grainy texture:
- Dissolve Sugar Completely: Ensure that the sugar is fully dissolved before the mixture comes to a boil. Undissolved sugar crystals can lead to a grainy texture.
- Avoid Stirring After Boiling: Once the mixture starts boiling, avoid stirring it. Stirring can encourage sugar crystallization.
- Use Corn Syrup: Corn syrup helps prevent sugar crystals from forming. A tablespoon or two can make a big difference.
- Cool Properly: Allow the mixture to cool to the correct temperature (around 110°F or 43°C) before beating. Beating the fudge while it’s too hot can cause it to become grainy.
- Beat Vigorously: Beat the fudge vigorously until it loses its glossy sheen and starts to thicken. This helps break down any sugar crystals that may have formed.
- Use a Clean Pan: Make sure your saucepan is clean and free of any sugar crystals before you start cooking.
18. How Long Does it Take for Fudge to Set Properly?
The setting time for fudge can vary depending on several factors, including the recipe, the humidity, and the temperature of your kitchen. However, here are some general guidelines:
- Room Temperature: Fudge typically takes several hours to set properly at room temperature. It’s best to leave it overnight for the best results.
- Refrigerator: Refrigerating fudge can speed up the setting process. It usually takes about 2-3 hours to set in the refrigerator.
- Factors Affecting Setting Time: High humidity can slow down the setting process. If you live in a humid climate, consider refrigerating the fudge to help it set more quickly.
- Patience is Key: Avoid cutting into the fudge before it’s fully set. Cutting it too early can result in a messy, soft texture.
19. What are the Best Occasions to Make Old Fashioned Fudge?
Old fashioned fudge recipe with evaporated milk and cocoa is perfect for a variety of occasions. Here are some ideas:
- Holidays: Fudge is a classic holiday treat, especially during Christmas and Thanksgiving.
- Parties: Fudge makes a great addition to any party spread.
- Gifts: Homemade fudge is a thoughtful and delicious gift for friends, family, and coworkers.
- Bake Sales: Fudge is a popular item at bake sales and fundraisers.
- Personal Indulgence: Sometimes, you just need a little something sweet to brighten your day. Fudge is the perfect treat for a personal indulgence.
20. What are Some Other Tips and Tricks for Making Amazing Fudge?
Here are some additional tips and tricks to help you make the best old fashioned fudge recipe with evaporated milk and cocoa:
- Use Quality Ingredients: The quality of your ingredients will impact the flavor and texture of your fudge. Use high-quality butter, cocoa powder, and vanilla extract for the best results.
- Don’t Double the Recipe: Doubling the recipe can make it more difficult to control the temperature and consistency. It’s best to make multiple batches if you need a large quantity of fudge.
- Add a Pinch of Salt: A pinch of salt enhances the sweetness and brings out the chocolate flavor.
- Experiment with Flavors: Don’t be afraid to experiment with different flavors and add-ins to create your own unique fudge recipe.
- Read Reviews: If you’re using a new recipe, read reviews from other bakers to get an idea of potential pitfalls and helpful tips.
- Practice Makes Perfect: Like any baking recipe, making fudge takes practice. Don’t be discouraged if your first batch isn’t perfect. Keep trying, and you’ll eventually master the art of fudge making.
Making old fashioned fudge recipe with evaporated milk and cocoa is a rewarding experience that brings a touch of nostalgia and sweetness into your life. Whether you’re a seasoned baker or a novice in the kitchen, following these tips and techniques will help you create a delicious treat that everyone will love.
FAQ: Old Fashioned Fudge Recipe with Evaporated Milk and Cocoa
1. Can I use regular milk instead of evaporated milk?
No, regular milk will not provide the same richness and creamy texture. Evaporated milk is concentrated, which is essential for the fudge’s consistency.
2. What if I don’t have a candy thermometer?
While a candy thermometer is highly recommended, you can use the cold water test. Drop a small amount of the hot mixture into cold water. If it forms a soft ball that can be flattened, it’s at the soft-ball stage.
3. Why is my fudge grainy?
Grainy fudge is usually caused by sugar crystals forming. Avoid stirring after the sugar is dissolved, and ensure the mixture reaches the correct temperature.
4. Can I add nuts to the fudge?
Yes, add chopped nuts after beating the fudge and before pouring it into the pan.
5. How long does homemade fudge last?
Homemade fudge can last up to 2 weeks at room temperature in an airtight container, or 2-3 weeks in the refrigerator.
6. Can I freeze fudge?
Yes, wrap the fudge tightly in plastic wrap and place it in a freezer-safe container. It can be frozen for up to 2-3 months.
7. What can I do if my fudge is too soft?
If the fudge is too soft, reheat it to the soft-ball stage, cool slightly, and beat again.
8. Is Dutch-processed cocoa better than natural cocoa for fudge?
Dutch-processed cocoa generally results in a smoother, less bitter flavor, making it a good choice for fudge.
9. Can I use a different extract instead of vanilla?
Yes, experiment with extracts like peppermint, almond, or orange, but use them sparingly as they can be potent.
10. How do I store fudge to keep it fresh?
Store fudge in an airtight container at room temperature or in the refrigerator to maintain its freshness.
At mens-fashion.net, we believe that style extends beyond clothing. It’s about embracing the finer things in life, whether it’s a perfectly tailored suit or a delectable piece of homemade fudge. Explore our website for more lifestyle tips and fashion inspiration, and don’t forget to try this old fashioned fudge recipe with evaporated milk and cocoa for a touch of classic indulgence.
Ready to elevate your lifestyle? Visit mens-fashion.net for the latest trends, expert advice, and exclusive content tailored for the modern man. Connect with us today and discover how to make every aspect of your life stylish and satisfying. Address: 227 W 27th St, New York, NY 10001, United States. Phone: +1 (212) 217-5800. Website: mens-fashion.net.