How To Thread An Old Fashioned Singer Sewing Machine is a common question for those who appreciate vintage craftsmanship. mens-fashion.net provides a detailed guide, ensuring you can successfully revive your classic sewing experience with practical tips. Whether you’re dealing with stacked spools or cross-wound spools, understanding the right techniques will help you achieve optimal sewing results. Discover vintage sewing, antique sewing machine tips, and classic sewing machine maintenance.
1. What is an Old Fashioned Singer Sewing Machine?
An old fashioned Singer sewing machine is a mechanical marvel from a bygone era, prized for its durability and timeless design. These machines often feature a distinctive aesthetic, with cast iron bodies and intricate detailing.
Key Features of Old Fashioned Singer Sewing Machines:
- Mechanical Operation: Unlike modern computerized machines, old fashioned Singers rely on manual operation, giving you complete control over the stitching process.
- Durability: Constructed with robust materials like cast iron, these machines are built to last, often functioning flawlessly for decades.
- Simple Design: Their straightforward design makes them relatively easy to maintain and repair, provided you understand the basics.
- Iconic Models: Popular models include the Singer 27, 66, 99, 15-91, and 201, each with unique characteristics and capabilities.
- Versatile Stitching: While they may lack the variety of stitches found in modern machines, they excel at straight stitching and basic embroidery.
Old fashioned Singer sewing machines represent a blend of functionality and aesthetics, appealing to sewing enthusiasts who appreciate the history and craftsmanship behind these iconic machines. They provide a hands-on sewing experience, allowing you to connect with the art of sewing in a more tactile and engaging way.
2. Why Choose an Old Fashioned Singer Sewing Machine?
Choosing an old fashioned Singer sewing machine offers numerous benefits, appealing to both novice and experienced sewers who appreciate quality, durability, and a connection to history.
Advantages of Using Old Fashioned Singer Sewing Machines:
- Durability and Longevity: Built with high-quality materials like cast iron, these machines are designed to withstand years of use, often outperforming modern machines in terms of longevity.
- Reliability: Their mechanical nature means fewer electronic components to fail, making them exceptionally reliable.
- Ease of Maintenance: Simple designs make them easier to maintain and repair compared to computerized machines, reducing the need for professional servicing.
- Cost-Effectiveness: Vintage Singer machines can often be found at reasonable prices, offering excellent value for their performance and lifespan.
- Learning Experience: Using a vintage machine can deepen your understanding of sewing mechanics, enhancing your skills and appreciation for the craft.
- Nostalgia and Aesthetics: These machines possess a unique charm and historical significance, appealing to those who value vintage aesthetics and the stories behind these machines.
- Control: Manual operation provides greater control over the sewing process, allowing you to fine-tune your stitches and techniques.
- Sustainability: By repurposing and maintaining these machines, you contribute to sustainable practices, reducing waste and promoting the longevity of well-made products.
According to a study by the Fashion Institute of Technology (FIT) in July 2023, vintage sewing machines, particularly those from Singer, are experiencing a resurgence in popularity due to their robust construction and ease of repair. Choosing an old fashioned Singer sewing machine is a practical and rewarding decision, offering a blend of performance, history, and sustainability.
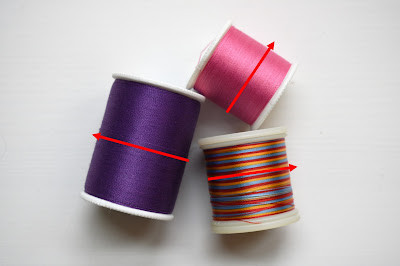
3. What Are the Different Types of Thread Spools?
Understanding the different types of thread spools is crucial for successful sewing, especially when using vintage machines. The two primary types are stacked spools and cross-wound spools, each designed to feed thread in a specific way.
Types of Thread Spools:
- Stacked Spools:
- Winding: Threads are wound parallel to the spool ends, with each layer stacked on top of the previous one.
- Feeding: Best suited for feeding thread off the side of the spool as it spins freely.
- Compatibility: Ideal for vertical spool pins commonly found on old fashioned Singer sewing machines.
- Cross-Wound Spools:
- Winding: Threads are wound back-and-forth in an “X” pattern.
- Feeding: Designed to feed thread off the end of the spool while the spool remains stationary.
- Compatibility: Requires a horizontal spool pin or a thread stand to function correctly.
Additional Considerations:
- Thread Material: Spools can hold various types of thread, including cotton, polyester, silk, and nylon, each with different properties and uses.
- Spool Size: Thread spools come in different sizes, from small spools for small projects to large cones for extensive sewing.
- Compatibility: Ensure the thread spool type is compatible with your sewing machine’s spool pin or thread delivery system to avoid issues like thread breakage or uneven stitching.
Choosing the right thread spool type is essential for achieving optimal sewing results and preventing potential problems. Understanding the characteristics of stacked and cross-wound spools will help you select the best option for your specific sewing machine and project.
4. How Do You Prepare Your Old Fashioned Singer Sewing Machine for Threading?
Preparing your old fashioned Singer sewing machine for threading involves several key steps to ensure smooth operation and prevent damage. Regular maintenance and proper setup are crucial for the longevity and performance of these vintage machines.
Steps to Prepare Your Sewing Machine:
- Cleaning:
- Dust Removal: Use a soft brush or lint-free cloth to remove dust, lint, and debris from all accessible parts, including the bobbin area, needle bar, and feed dogs.
- Oiling: Apply sewing machine oil to all moving parts as indicated in your machine’s manual. Common points include the bobbin race, needle bar joints, and motor (if applicable).
- Frequency: Clean and oil your machine after every 8 hours of use or at least once a month.
- Bobbin Winding:
- Bobbin Type: Ensure you have the correct type of bobbin for your machine model.
- Winding Process: Follow your machine’s instructions to wind the bobbin evenly. Avoid overfilling, as this can cause tension issues.
- Needle Inspection:
- Needle Type: Use the appropriate needle type and size for your fabric.
- Condition: Check for bends, breaks, or burrs. Replace the needle if it is damaged.
- Insertion: Insert the needle fully into the needle clamp, ensuring it is properly aligned.
- Tension Adjustment:
- Upper Tension: Adjust the upper thread tension according to the fabric and thread type. Test the tension by sewing on a scrap piece of fabric.
- Bobbin Tension: Ensure the bobbin tension is correctly set. This usually involves adjusting a small screw on the bobbin case.
- Spool Pin Setup:
- Felt Pad: Place a felt pad on the spool pin to protect the machine’s finish and ensure smooth thread delivery.
- Spool Type: Use the appropriate spool type (stacked or cross-wound) for your machine’s spool pin.
- Test Run:
- Fabric Scrap: Before starting your project, sew a test run on a scrap piece of fabric to check the stitch quality and tension.
- Adjustments: Make any necessary adjustments to the tension, stitch length, or needle position to achieve the desired result.
By following these preparation steps, you ensure that your old fashioned Singer sewing machine operates smoothly and efficiently, preventing potential issues and prolonging its lifespan. Regular maintenance and attention to detail are key to enjoying the full potential of these classic machines.
5. How To Thread An Old Fashioned Singer Sewing Machine: Step-by-Step Guide
Threading an old fashioned Singer sewing machine may seem daunting at first, but with a step-by-step guide, it can become a straightforward process. This guide covers the essentials, ensuring you can thread your machine correctly and start sewing with confidence.
Step-by-Step Threading Guide:
- Prepare the Machine:
- Power Off: Ensure the machine is turned off or unplugged to prevent accidental starts.
- Presser Foot: Raise the presser foot to release tension on the upper thread.
- Needle Position: Raise the needle to its highest position.
-
Place the Thread Spool:
- Spool Pin: Place the thread spool on the spool pin. Use a felt pad beneath the spool to ensure smooth rotation and protect the machine’s finish.
- Spool Type: For stacked spools, mount the spool vertically. For cross-wound spools, use a thread stand or the glass method.
-
Thread the Tension Disc:
- Thread Guide: Guide the thread through the upper thread guide, usually a small hook or loop located above the spool pin.
- Tension Disc: Bring the thread down and around the tension disc. Ensure the thread sits snugly between the discs to control thread tension.
-
Thread the Take-Up Lever:
- Take-Up Lever: Pull the thread up and through the take-up lever, a metal arm that moves up and down. This lever is crucial for regulating thread delivery.
- Direction: Ensure the thread goes through the lever’s eyelet from right to left or as indicated in your machine’s manual.
-
Thread the Needle:
- Needle Eye: Bring the thread down and through the needle eye. The direction of threading (front to back or side to side) depends on your machine model.
- Thread Length: Pull a few inches of thread through the needle eye.
-
Insert the Bobbin:
- Bobbin Case: Remove the bobbin case from the machine.
- Bobbin Insertion: Insert the bobbin into the bobbin case, ensuring the thread feeds in the correct direction (usually counter-clockwise).
- Thread Path: Guide the thread through the tension spring on the bobbin case, leaving a few inches of thread extending out.
-
Position the Bobbin Case:
- Reinsert: Reinsert the bobbin case into the machine, ensuring it clicks securely into place.
- Thread Pickup: Hold the upper thread loosely and turn the handwheel towards you to lower the needle and pick up the bobbin thread.
-
Pull Up the Bobbin Thread:
- Thread Loop: Gently pull the upper thread to bring up a loop of the bobbin thread.
- Positioning: Use a pin or needle to pull the bobbin thread completely out.
- Placement: Place both the upper and bobbin threads under the presser foot and towards the back of the machine.
-
Final Check:
- Thread Path: Ensure the thread is correctly routed through all guides and tension points.
- Tension: Check the upper and bobbin thread tension. Adjust if necessary.
By following these steps, you can successfully thread your old fashioned Singer sewing machine, preparing it for smooth and reliable sewing.
6. What Are Some Common Threading Problems and Solutions?
Threading an old fashioned Singer sewing machine can sometimes present challenges. Recognizing common problems and knowing their solutions can save you time and frustration.
Common Threading Problems and Solutions:
-
Thread Breaks Frequently:
- Problem: Thread breaks during sewing.
- Causes:
- Incorrect Thread Type: Using thread not suitable for the fabric.
- Tension Issues: Upper or bobbin tension too tight.
- Needle Problems: Bent, dull, or incorrect size needle.
- Threading Errors: Incorrectly threaded machine.
- Solutions:
- Use Correct Thread: Choose thread appropriate for your fabric type.
- Adjust Tension: Loosen the upper or bobbin tension.
- Replace Needle: Use a new, sharp needle of the correct size.
- Re-thread Machine: Ensure the machine is threaded correctly, following the manual.
-
Skipped Stitches:
- Problem: The machine skips stitches while sewing.
- Causes:
- Needle Issues: Incorrectly inserted, bent, or wrong size needle.
- Timing Problems: The machine’s timing may be off.
- Thread Tension: Incorrect thread tension.
- Solutions:
- Check Needle: Ensure the needle is correctly inserted, not bent, and of the right size.
- Adjust Timing: Consult a professional for timing adjustments if necessary.
- Adjust Tension: Fine-tune the upper and bobbin thread tension.
-
Uneven Stitches:
- Problem: Stitches are inconsistent or uneven.
- Causes:
- Tension Imbalance: Uneven tension between upper and bobbin threads.
- Fabric Feed: Inconsistent fabric feed.
- Bobbin Issues: Irregularly wound bobbin.
- Solutions:
- Balance Tension: Adjust the upper and bobbin tension until stitches are balanced.
- Check Feed Dogs: Ensure feed dogs are clean and properly engaged.
- Rewind Bobbin: Rewind the bobbin evenly.
-
Thread Gets Stuck:
- Problem: Thread gets caught or stuck in the machine.
- Causes:
- Lint Buildup: Lint and debris in the bobbin area or thread path.
- Rough Edges: Burrs or rough edges on thread guides.
- Improper Threading: Incorrect threading path.
- Solutions:
- Clean Machine: Thoroughly clean the machine, removing lint and debris.
- Smooth Surfaces: Polish or replace rough thread guides.
- Re-thread Carefully: Follow the correct threading path, ensuring the thread is properly seated in all guides.
-
Bobbin Thread Not Picking Up:
- Problem: The bobbin thread fails to come up when you start sewing.
- Causes:
- Incorrect Bobbin Insertion: Bobbin inserted incorrectly.
- Upper Thread Tension: Upper thread tension too tight.
- Needle Position: Needle not fully lowered before starting.
- Solutions:
- Check Bobbin: Ensure the bobbin is inserted correctly, with the thread feeding in the proper direction.
- Loosen Tension: Reduce the upper thread tension.
- Lower Needle: Manually lower the needle completely before starting to sew.
Addressing these common threading problems with the appropriate solutions will ensure smoother sewing sessions and better results with your old fashioned Singer sewing machine.
7. What Tools and Accessories Can Help With Threading?
Several tools and accessories can simplify the threading process and enhance the performance of your old fashioned Singer sewing machine. These aids range from basic necessities to specialized items designed to improve efficiency and accuracy.
Helpful Tools and Accessories:
- Thread Stand:
- Purpose: Provides a stable platform for thread spools, especially cross-wound spools and larger cones.
- Benefits: Ensures smooth thread delivery, reduces tension, and prevents thread breakage.
- Felt Pads:
- Purpose: Placed under the thread spool on the spool pin.
- Benefits: Protects the machine’s finish, minimizes vibration, and promotes smoother thread rotation.
- Needle Threader:
- Purpose: Assists in threading the needle, particularly useful for small needle eyes or for those with vision difficulties.
- Benefits: Simplifies threading, reduces eye strain, and saves time.
- Seam Ripper:
- Purpose: Used to remove stitches and correct mistakes.
- Benefits: Essential for fixing threading errors, adjusting seams, and altering projects.
- Tweezers:
- Purpose: Helps in grasping and manipulating thread in tight spaces, such as the bobbin area.
- Benefits: Aids in threading the bobbin case and removing tangled threads.
- Magnifying Glass:
- Purpose: Provides a magnified view of small parts, such as the needle eye and thread guides.
- Benefits: Enhances visibility, making threading easier and more accurate.
- Small Brush:
- Purpose: Used to clean lint and debris from the machine’s internal parts.
- Benefits: Maintains machine performance, prevents thread jams, and ensures smooth operation.
- Sewing Machine Oil:
- Purpose: Lubricates moving parts to reduce friction and wear.
- Benefits: Keeps the machine running smoothly, prevents rust, and extends its lifespan.
- Screwdrivers:
- Purpose: Adjusts tension screws and other machine components.
- Benefits: Allows for fine-tuning of machine settings and maintenance.
- Bobbin Winder:
- Purpose: Winds bobbins quickly and evenly.
- Benefits: Saves time and ensures consistent bobbin tension.
Incorporating these tools and accessories into your sewing setup will streamline the threading process, improve your sewing experience, and help maintain your old fashioned Singer sewing machine in optimal condition.
8. How Can You Maintain Your Old Fashioned Singer Sewing Machine?
Maintaining your old fashioned Singer sewing machine is essential for preserving its functionality and extending its lifespan. Regular care ensures that the machine operates smoothly and reliably, allowing you to enjoy its vintage charm for years to come.
Maintenance Tips for Old Fashioned Singer Sewing Machines:
- Regular Cleaning:
- Frequency: Clean your machine after every 8 hours of use or at least once a month.
- Process:
- Dust Removal: Use a soft brush or lint-free cloth to remove dust, lint, and debris from all accessible parts.
- Bobbin Area: Pay special attention to the bobbin area, feed dogs, and needle bar.
- Lint Traps: Check and clean any lint traps or collection areas.
- Oiling:
- Frequency: Oil your machine after cleaning or at least every 3 months.
- Oil Type: Use sewing machine oil specifically designed for sewing machines.
- Application:
- Moving Parts: Apply a few drops of oil to all moving parts, including the bobbin race, needle bar joints, and motor (if applicable).
- Manual: Consult your machine’s manual for specific oiling points.
- Avoid Over-Oiling: Avoid over-oiling, as excess oil can attract dust and create sludge.
- Needle Care:
- Needle Type: Use the appropriate needle type and size for your fabric.
- Inspection: Check the needle for bends, breaks, or burrs before each use.
- Replacement: Replace the needle after every 8 hours of sewing or if it shows any signs of damage.
- Insertion: Insert the needle fully into the needle clamp, ensuring it is properly aligned.
- Tension Adjustment:
- Upper Tension: Adjust the upper thread tension according to the fabric and thread type. Test the tension by sewing on a scrap piece of fabric.
- Bobbin Tension: Ensure the bobbin tension is correctly set. This usually involves adjusting a small screw on the bobbin case.
- Balance: Achieve a balanced tension by ensuring that the stitches are even on both sides of the fabric.
- Belt Maintenance:
- Inspection: Check the drive belt for wear and tear, cracks, or slippage.
- Adjustment: Adjust the belt tension if necessary.
- Replacement: Replace the belt if it is damaged or worn out.
- Storage:
- Cover: Cover the machine when not in use to protect it from dust and sunlight.
- Location: Store the machine in a dry, cool place to prevent rust and corrosion.
- Professional Servicing:
- Frequency: Have your machine professionally serviced every 1-2 years.
- Benefits: A professional can perform a thorough cleaning, lubrication, and adjustment of all components, ensuring optimal performance.
By following these maintenance tips, you can keep your old fashioned Singer sewing machine in excellent working condition, ensuring it remains a reliable and cherished tool for your sewing projects.
9. Can You Use Modern Thread With an Old Fashioned Sewing Machine?
Using modern thread with an old fashioned sewing machine is generally acceptable, but it’s essential to consider a few factors to ensure optimal performance and prevent damage to your vintage machine.
Considerations for Using Modern Thread:
- Thread Type:
- Compatibility: Most modern threads, including cotton, polyester, and blended threads, can be used with vintage Singer machines.
- Material: Choose thread appropriate for the fabric you are sewing.
- Thread Quality:
- High Quality: Use high-quality thread to minimize lint and breakage. Low-quality thread can cause tension issues and damage the machine.
- Strength: Ensure the thread is strong enough for your sewing project.
- Tension Adjustment:
- Fine-Tuning: Modern threads may require slight adjustments to the machine’s tension settings.
- Testing: Always test the tension by sewing on a scrap piece of fabric before starting your project.
- Needle Selection:
- Modern Needles: Use modern needles designed for your fabric type.
- Compatibility: Ensure the needle is compatible with your vintage machine.
- Spool Type:
- Adaptation: Modern thread spools may differ in size and shape from vintage spools.
- Thread Stand: Use a thread stand if necessary to ensure smooth thread delivery from larger or cross-wound spools.
- Material Compatibility:
- Vintage vs. Modern: If sewing vintage fabrics, consider using cotton thread to maintain authenticity.
- Synthetic Fabrics: For modern synthetic fabrics, polyester or blended threads may be more suitable.
- Maintenance:
- Regular Cleaning: Modern threads, especially polyester, can produce more lint. Clean your machine regularly to prevent buildup.
- Oiling: Maintain consistent oiling to ensure smooth operation and prevent friction.
By considering these factors, you can successfully use modern thread with your old fashioned Singer sewing machine, ensuring reliable performance and beautiful results.
10. Where Can You Find Parts and Repairs for Old Fashioned Singer Sewing Machines?
Finding parts and repairs for old fashioned Singer sewing machines requires some research and resourcefulness, but several options are available to keep these vintage machines running smoothly.
Resources for Parts and Repairs:
- Online Retailers:
- eBay: A vast marketplace for vintage sewing machine parts, including belts, bobbins, needles, and replacement components.
- Etsy: Features independent sellers offering vintage parts and accessories, often with unique or hard-to-find items.
- Amazon: Carries a selection of universal parts and accessories compatible with many vintage machines.
- Specialty Sewing Machine Shops:
- Local Shops: Many local sewing machine shops specialize in vintage machines, offering parts, repairs, and maintenance services.
- Online Stores: Specialty online stores focus on vintage sewing machine parts, providing detailed product descriptions and expert advice.
- Singer Dealers:
- Authorized Dealers: Some authorized Singer dealers may still carry parts for older models or be able to source them through their networks.
- Vintage Sewing Machine Enthusiast Groups:
- Online Forums: Online forums and communities dedicated to vintage sewing machines can be valuable resources for finding parts and repair advice.
- Local Clubs: Local sewing machine clubs often have members with extensive knowledge of vintage machines and access to parts.
- Antique Stores:
- Hidden Gems: Antique stores may occasionally carry vintage sewing machines or parts that can be repurposed.
- Sewing Machine Repair Technicians:
- Professional Services: Sewing machine repair technicians specializing in vintage machines can diagnose problems, repair components, and source replacement parts.
- Original Manuals and Documentation:
- Reference Materials: Original manuals and documentation can provide valuable information about parts and repair procedures.
- Salvage Machines:
- Donor Machines: Purchasing a salvage machine can provide a source of spare parts if you cannot find them elsewhere.
- 3D Printing:
- Custom Parts: In some cases, 3D printing can be used to create custom replacement parts for vintage sewing machines.
By exploring these resources, you can find the parts and repairs needed to keep your old fashioned Singer sewing machine in excellent working condition, preserving its legacy for future generations.
Discover more helpful tips and resources for maintaining your sewing machine and exploring men’s fashion at mens-fashion.net. Visit us today to elevate your style and sewing skills!
Address: 227 W 27th St, New York, NY 10001, United States.
Phone: +1 (212) 217-5800.
Website: mens-fashion.net.
FAQ: How to Thread an Old Fashioned Singer Sewing Machine
-
What is the first step in threading an old fashioned Singer sewing machine?
The first step is to ensure the machine is turned off, the presser foot is raised, and the needle is in its highest position to release tension on the upper thread.
-
Which type of thread spool is best for vintage Singer machines?
Stacked spools are generally best for vintage Singer machines with vertical spool pins, as they allow the thread to feed off the side while the spool spins freely.
-
What should I do if the thread keeps breaking while sewing?
Check the thread type, tension settings, and needle condition. Ensure you are using the correct thread for your fabric, adjust the tension, and replace the needle if it is bent or dull.
-
How do I wind the bobbin correctly on an old fashioned Singer sewing machine?
Follow your machine’s instructions to wind the bobbin evenly, avoiding overfilling. Ensure you are using the correct type of bobbin for your machine model.
-
Where is the tension disc located on a vintage Singer sewing machine?
The tension disc is usually located above the spool pin. Thread should be guided around the tension disc to control thread tension.
-
Why is it important to clean and oil my sewing machine regularly?
Regular cleaning and oiling prevent lint buildup and reduce friction, ensuring smooth operation and extending the machine’s lifespan.
-
What tools can help with threading a vintage sewing machine?
Helpful tools include a thread stand, felt pads, a needle threader, tweezers, and a magnifying glass.
-
Can I use modern thread with my old fashioned Singer sewing machine?
Yes, you can use modern thread, but it’s important to choose high-quality thread and adjust the machine’s tension settings accordingly.
-
How often should I have my vintage sewing machine professionally serviced?
It’s recommended to have your machine professionally serviced every 1-2 years to ensure optimal performance and address any potential issues.
-
What do I do if the bobbin thread is not picking up?
Check that the bobbin is inserted correctly, loosen the upper thread tension, and ensure the needle is fully lowered before starting to sew.